Wednesday, May 19, 2010

Pickled Asparagus (Again)

Can Jam Challenge #5

I don’t know what the heck happened to the asparagus this season. Usually, asparagus is $3.99 a pound or HIGHER in Florida, comes from Peru, and tastes like shoelaces. But there’s a small window of opportunity every spring where I can buy it for around $1.49 a pound and I could even drive to where it was grown. It would be a long drive, but I digress.

But this year, NADA. Nature’s french-fries never dropped below $2.50 this year and I was lucky if they came from California. Mostly, it stayed around $3 and up per pound in all my groceries. And there’s no such thing as a “farmers market” that sells organic or local asparagus in Florida.

Ahem.

What the heck happened? Was it the hard winter? Are farmers not growing the stuff? Was there a disease or insect problem? Is there a cycle on production?

And I don’t even want to GO THERE on rhubarb. There was ‘nar a stalk to be found in any of the groceries, and the one rare glimpse I did see, wrapped in styrofoam and cellophane, cost around $7.00 for 5 STALKS!!!

Plus, I don’t like the stuff, so that’s no big loss for me (hee-hee).

Canned pickled asparagus
So, in keeping with the sprit of local and available ingredients, I’m afraid this month’s Can Jam Challenge will contain a visit from the ghost of post’s past. Besides, I can’t think of anything I would rather do when preserving asparagus than pickle it. It’s my favorite.

Until next year, I guess I’ll have to pickle more cukes!

Pickled Asparagus
Recipe source: The Joy of Pickling
Makes 5, 12 oz. jars

3 lbs of fresh asparagus (sometimes I need more or less, depending on spear thickness)
5 garlic cloves, peeled
15 allspice berries
50 black peppercorn berries
20 coriander seeds
Red pepper flakes
Nutmeg
2 ½ cups white wine vinegar
2 ½ cups water
2 ½ tsp canning salt
2 T sugar

Trim asparagus to fit inside canning jars, giving ½ inch of space from the tip of the spears to the top of the jar. Prepare jars for hot water bath canning. In a saucepot, mix vinegar, water, salt, and sugar; bring to a boil. When brine has boiled, fill each hot jar with 1 garlic clove, 3 allspice berries, 10 black peppercorns, 4 coriander seeds, a dash or two of the red pepper flakes, and a pinch of nutmeg. Fill jars with asparagus spears, tips up, till comfortably full without packing. Ladle brine into jars, giving ½ inch headspace; top jars with prepared lids, then process in a boiling water bath for 10 minutes. Wait 4-6 weeks before eating.

**Note: If you don't want to process for canning, just pour the hot brine over the asparagus and keep in the refridgerator.

Thursday, May 13, 2010

Garden Snacks!

The garden is back to its beautiful prime, including these adorable, little tomatoes I call my "garden snacks." I don't plant these; they grow willy-nilly every year, but mostly concentrate in one area of the garden. I snack on them as I go about pulling weeds, trimming this or that. They're smaller than typical grape tomatoes and they're delicious!


I received the mother plants as a gift in a plant swap years ago at Seminole Springs Nursery. I wish I remembered the name of who gave them to me. All I remember was his name was Tom and something about "friends-don't-let-friends-plant-Tom's-Tomatoes," and here we are.

Every year they sprout up on their own and I laugh. For the longest time, I couldn't grow tomatoes and these babies popped up without any help. They're a welcome, cheerful, and tasty gift that keeps on giving!

Tuesday, May 11, 2010

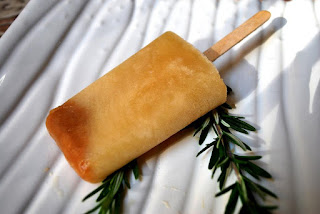
Apple Cider and Rosemary Ice Pops

I cannot begin to explain how much I LOVE these popsicles! They are so refreshing and tasty I have to really try hard to only eat just one per day.

Apple cider and rosemary ice pops

Remember that little comment I made about summer being just around the corner? Well it’s here and these popsicles will definitely keep you cool. These would be perfect as a dessert for a grown-up barbeque or summer dinner.

Apple Cider and Rosemary Ice Pops
Recipe Source: Bon Appetit

4 cups apple juice or cider
½ cup water
½ cup sugar
2 tablespoons chopped fresh rosemary
1 cinnamon stick, broken in half
2 whole cloves
4 teaspoons apple cider vinegar
¼ teaspoon vanilla extract

Combine apple juice, water, sugar, rosemary, and spices in a saucepan and heat medium-high, till mixture reaches a boil. Reduce temperature to a light simmer and reduce mixture to 3 ½ cups, 20 to 25 minutes. Strain into a 4-cup measuring cup and cool to room temperature. Stir in vinegar and extract. Pour into popsicle molds and freeze overnight or till set.

Wednesday, May 05, 2010

The Good and The Bad - Part II

I’m not sure you can tell in the picture, but that is a bathtub FULL OF CUCUMBERS.

A couple of years ago, I learned the hard way that pickling season in Florida does not equal the same pickling season for the rest of the country. At the time, I experimented with a fermented pickle recipe, which required several days of open air fermenting, adding new brine, and skimming scum.

All my pickle peeps were claiming these pickles were the bee’s knees, so I promptly went out and picked up 3 bushels of fresh cukes. I was anxious to have quarts and quarts of delicious, home-fermented dill pickles, so I gave it a shot.

Now, by the time early-season cukes are ready in Florida (May), the weather is already on the verge of hot-as-balls. As of this past weekend, the temps were already in the mid-to-upper 90’s, so you can imagine what temperatures like this can do to fermenting cucumbers. After the third day of my “pickle experiment,” my husband and I walked into the house to a smell that resembled fresh road kill and rotting vegetables. The fruit flies were having a party, and we weren’t invited.

It took many trips to the compost pile and many hours of cleaning, scrubbing, and disinfecting to clean up the mess. Now, several years later, I know that fermenting vegetables require very COOL temps, and we have a very short, if any, window of opportunity in the Sunshine State. I did; however, successfully make some awesome sauerkraut this past winter!
Pickle season is upon us again, and I am looking forward to another stab at making the perfect pickle. I’m almost there!

Wednesday, April 21, 2010

Thai Basil Pepper Jelly

Tigress Can Jam Challenge #4
A couple of years ago, I had found an intriguing recipe for a Thai Basil Jelly through my beloved Harvest Forum. But as I imagined the end result while reading the instructions, something didn’t seem quite right, like it initially started as one recipe but ended with something else. There were steps missing, ingredients left out, and it was just plain wonky, so I decided to make my own recipe.

After consulting a few Canning Jedi Masters on the Harvest Forum and jazzing up a current Ball recipe for Basil Banana Pepper jelly, I created something that will knock your socks off! My Thai Basil plants are planted and I’m just waiting to get started on another batch. If you can't find Thai Basil, Sweet Basil, or any other fresh basil will work just fine for making the infused vinegar.

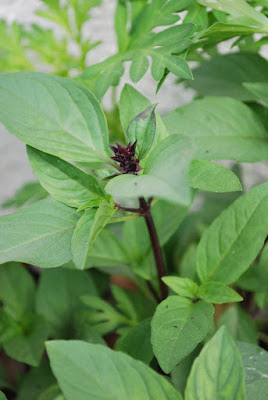
But if you can swing it, do try the Thai Basil. It's so exotic that it brings the flavor profile for this jelly to another level.

Fresh Thai basil
I’m a big believer of layered flavors, infused ingredients, and all things macerated. I’ve actually had friends argue over who got the last jar of this wonderful jelly! The preparation for this recipe takes some time, but its well worth it. Besides the amazing taste, this recipe makes a beautiful, jeweled jelly.


Go over to my other post to see how I make the Thai Basil infused vinegar: Thai Basil Infused Vinegar

*Note: You will need at least 2 weeks prior to make the Thai Basil Infused vinegar before making this jelly.

Kathy's Thai Basil Pepper Jelly
Recipe adapted/modified from Ball “Basil Banana Pepper Jelly”
Makes 8 half-pints


1 cup sweet bell peppers (green), uniformly minced
½ cup hot peppers (red), uniformly minced
½ cup red onion, uniformly minced
½ tsp dried basil
1 ½ cups Thai Basil infused vinegar*
6 cups sugar
2 pouches liquid pectin

To make Thai Basil Infused Vinegar: Roughly chop about 2 cups of rinsed, fresh Thai Basil and place it in a quart canning jar. Fill jar with white vinegar, place lid on jar, and let vinegar mixture sit at room temperature (in a cool, shaded spot) for 2 weeks. After two weeks, strain vinegar and discard basil*.

To make jelly: Combine the minced vegetables, dried basil, infused vinegar, and sugar in a large saucepan. Bring to a full boil, add the pectin, and boil hard (stirring constantly) for 1 full minute. Ladle hot jelly into prepared, half-pint canning jars and process in a BWB for 10 minutes.

*Note: any remaining infused vinegar can be stored in a salad vinegar bottle and used for viniagrette dressing, marinades, you name it!

Wednesday, March 24, 2010

For All You Salty-Tooths Out There

Many, many, MANY moons ago, I used to have a part-time job as one of those convention-show cookware chefs. You know the ones who gather groups of people around and demonstrate how wonderful, awesome, and HEALTHY their cookware can put together a 12-course meal in under 30 minutes. Yeah, that was me.

We sold a version of stackable, stainless-steel cookware. For real. One could literally stack a 4-foot high tower of pots on top of the other and cook at the same time.

Ohhhh, the memories…I haz them!

Anyway, my point is, and I do have one, that while I was learning the lucrative trade of being a cookware salesperson, I learned that people either have a propensity for sweet or salty cravings. For me, it’s definitely salt, while my husband has the sweet tooth in the family. If there is a pint of ice-cream in the freezer, meh, but a bag of Doritos? NO SUDDEN MOVEMENTS!

So, when I discovered this amazingly simple, and flavorful snack this past week, I thought I had died and gone to heaven. It’s an oldie-but-goodie that I somehow managed to bypass over the years.

Homeroom ranch oyster crackers
They’re perfect, very flavorful, bite-sized snacks that will satisfy any salty-tooth. Double the recipe amount; you’ll thank me for it.

Homeroom Ranch Oyster Crackers

1, 1 oz. package of Ranch Dressing mix/powder
1/2 teaspoon of dried dill
1/4 teaspoon of garlic powder
1/4 teaspoon of lemon pepper (optional)
1/4 cup vegetable or canola oil
5 cups oyster crackers (1 package)

Preheat oven to 250°. Mix the Ranch dressing mix and dry seasonings with the oil. Pour oil mixture over oyster crackers in a bowl and mix well. Spread crackers evenly on a cookie sheet and bake 15-20 minutes, or until evenly brown. Gently stir about half way through baking.

Thursday, March 18, 2010

Caramelized Red Onion Relish

Tigress Can Jam Challenge #3

I’m kind of on the hind end on submitting this month’s Can Jam Challenge.

Onions? Really? Alliums?

I wasn’t really enthused about this month’s canning choice, actually. I know most alliums are low-acid root vegetables, so my options were pretty much limited for a boiling water bath. I knew I could either make a relish, pickle, or some sort of savory jelly/jam, so I decided to go with what I know instead of trying something new.

I know; I’m such a party-pooper!

I’ve been making this relish for years and I guard it as much as I do with my Pickled Asparagus. It makes a small amount and requires A LOT of onions, but when it is piled on a grilled hot dog with ketchup, mustard, and homemade sauerkraut, it’s almost a holy experience. I have also found that it’s great as an appetizer with cheese, crackers, and other yummy nibblers like olives or salami.

Appetizer tray with caramelized onion relish
My notes from past batches mention to watch the original sugar amount because I found ¼ cup of brown sugar was too sweet (I like it a bit more savory-tangy). I’ve also found that doubling the original recipe yields 4 ½ pints, which makes it much more worth the effort.

Caramelized Onion Relish
Recipe Source: “Small Batch Preserving” by Ellie Topp
Makes 2 cups

2 large, red onions, peeled and sliced very thin (I use a mandolin)
¼ cup firmly packed brown sugar
1 cup dry red wine
3 tablespoons balsamic vinegar
1/8 teaspoon each of salt and freshly ground pepper

Combine onions and sugar in a heavy skillet or Dutch oven. Cook, uncovered on med-high heat for about 25 minutes, or until onions turn golden and start to caramelize, stirring frequently.

Stir in wine and vinegar. Bring to a boil, then reduce heat and simmer for about 15 minutes or until most of the liquid has evaporated, stirring frequently.

Season to taste with salt and pepper. Ladle into prepared jars, leaving ½ inch of headspace. Process in a boiling water bath for 10 minutes.

Monday, March 15, 2010

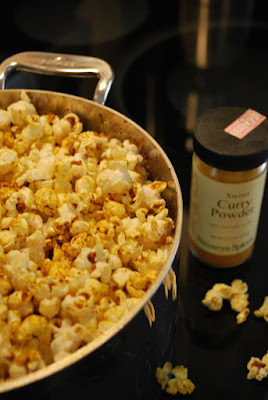
Curried Popcorn!

So, did anyone watch "The Pacific" miniseries premier last night on HBO? Anyone?

When I was in high school, history was mostly white noise for me. As an adult, I find myself fascinated by Civil War and World War II history. I'm not very good at remembering specific battles, or what event happened before another started, but I'm pretty good at remembering personal stories.

I thought "The Pacific" got off to a good start, but it's hard not to compare it to "Band of Brothers". When "Band of Brothers" started, there was a lot of emphasis on personal stories and backgrounds told up front, but I feel the producers for "The Pacific" tried too hard to wow their watchers with boom and gore from the get-go. I dunno...we'll see how the rest goes.

Anyway, I love rediscovering cookbooks I didn't know I had! A few weeks ago, I found "Perfect Recipes for Having People Over" by Pam Anderson (no, not THAT Pam Anderson) hidden from plain view. On page 116 was this very delicious treasure...perfect for t.v.!

Yum! Curried popcorn!
Curried Popcorn
Recipe by: Pam Anderson "Perfect Recipes for Having People Over"

3 tablespoons vegetable oil
1 tablespoon curry powder
1 teaspoon salt (I omited this)
2/3 cup plain popcorn kernels

Place all ingredients in a Dutch oven or other heavy-bottomed pot. Turn heat to med-high and cook, stirring occaisionally, until corn starts to sizzle. Cover and cook, shaking pot frequently at the beginning, then constantly at the end, until corn is completely popped, 4-5 minutes. Salt to taste.

Friday, March 12, 2010

Beware of Strange Bags of Leaves

So, on the way to Leu Gardens to get our membership the other day, I take one of the back roads through one of the urban neighborhoods. Along the way, I spot the BIGGEST bag of oak leaves at the end of someone's driveway, waiting for trash pick-up. I think to myself, "Hmmmm...if that is still there when I come back, I'm going to totally grab it!"

Once I am all set up at Leu, I take the same route home. Sure enough, the huge-ass bag of leaves is still there. So, I pull into the driveway, pop the hatch on my PT Cruiser, put the seats down, and heave this 55 gal bag of the most beautiful, mulched leaves into the back of the car. It barely fit! And to make it more interesting, the people who bagged it used the most flimsiest bag material ever created. Grocery store bags are tougher than this bag was. Wet wonton noodles are tougher than this bag was! So, it tore a little, but AHA! I put a blanket down before lugging this thing in there....GO ME!

So, I'm just proud as a peach at this point. I hop back in the car and cruised on down to 17-92 to go home. It's traffic light after traffic light, and I knew I had a good 30-45 min to get home. At about the 3rd light, my throat starts feeling gritty, and my sinuses start turning on the water-works, I cough a few times and it hits me....WAIT A MINUTE, AREN'T I ALLERGIC TO OAK????!!!!

I panic like a caged animal. What do I do? Do I pull over and redump? How am I gonna drive 45 minutes with the equivalent of a biological bomb in my backseat??!! My frugal mind says, "Tough it out. Roll the windows down. Take the expressway." So, I do, knowing I'd probably be home in half the time.

So, maybe in my urgency to avoid drowning in my own snot, I might have been going a little fast. Maybe the blasting sound of going down the expressway with all four windows open distracted me. I don't know. But, somewhere between 65-75 mph, a tornado of leaves and dirt erupts from the back of my car. LEAVES EVERYWHERE!

Leaves in the console,
Leaves in the dashboard,
Leaves at supper time!

AND DIRT! Holy shitmotherfuckersonofabitch!!!! I pull over, but the damage is done. The inside of my car looks like a compost pile and I curse a blue streak any sailor would be proud of. Thank GOD I didn't get pulled over by the cops!

So, I get back in the car, roll the windows up to a manageable choking level and s-l-o-w-l-y drive home. It took me over 2 hours to clean out all those fucking leaves with our shop vac and the car will still need serious detailing.

Did I mention my husband gets home tonight from a business trip??? I've got some 'splaining to do!

Oh well, at least this wasn't as bad as the time a package of cheese rolled out from a grocery bag and got stuck under the driver's seat....for a WEEK!

Sigh.

Wednesday, March 10, 2010

Let Them Eat Cake!

I’ve been up to my armpits baking these past two days. Did I say my friend is getting married next month? I meant THIS month! On the 20th even! Ack!

More coffee please!

Whenever I have a big cake event coming up, I bake the cakes ahead of time, wrap them very, very well in parchment and Saran wrap, and then freeze. When it’s time to frost, I take the cakes out, let them defrost (wrapped) at room temp, and away we go. Not only does this save a HUGE amount of time, it makes the cakes more moist! Just be sure to leave them wrapped when they are defrosting. Unwrapping while they defrost will actually dry them out.

The process has been tedious because I only have one set of square pans, so that means I can only bake one cake in that particular pan at a time. The cake is going to be 4 tiers, square, starting at 12”, and graduating up to 6”. So, why just one set of pans, you ask?

Well, number one, unless I go into the wedding cake making business, the chances of me needing two of each pan is slim-to-none, plus I have the time. Number two, you might be screaming, “Torte, torte, torte!!” But alas, this is where I get all soapbox on your ass.

I have a very simple approach to cake, and well, I want the emphasis to be on the cake. I don’t know where or when it became vogue to have 7 layers of “vanilla-bean-English-lemon-curd-chiffon,” alternating with “pineapple-white-chocolate-mousse,” and enveloped in a “hazelnut-rum-framboise-buttercream.”

Where’s the cake? Show me the cake!!

When I eat cake, I want the frosting or filling to compliment the cake, not overwhelm it. It’s wedding CAKE, right? Not wedding FROSTING or wedding FILLING…although I used to work with a lady who would ask everyone to give her their buttercream from the monthly birthday cakes. She’d eat the buttercream, big, goopy spoonfuls of it, and ditch the cake.

Yech!

I make one filling and two layers, maybe 3 layers max for each cake. The cakes are made 100% from scratch, with tested recipes, and don’t need a lot of “buttercream bling” to make it better, or hide what it’s lacking. They’re not particularly artsy, although pretty. I’d rather spend most of my time on substance, not structure.

So, I say, “Let them eat cake!” and save the frosting for that lady I used to work with.

Tuesday, March 02, 2010

Wafflely

A good friend of mine is getting married next month and I am going to make her wedding cake! I'm nervous because I've never made a cake for someone that really had to count. It's a pretty simple cake, but still....ACK!

I love weddings!

Tuesday, February 23, 2010

Banana-Cranberry Spice Muffins

A few weeks ago, our local supermarket had Fiber One on sale for buy-one-get-one-free. Well, since one serving of this stuff provides enough fiber to last you for something like, 5 days, I thought, "This might be a good thing."

So we bought one box of the Raisin Bran Roughage, and one box of the original Fiber One cereal. You know, the kind that looks like cat chow or rabbit pellets. I've never liked this stuff, but had heard that you could hide it in baked goods. So, I went to the Fiber One website and found a recipe for Banana-Cranberry Spice Muffins.

Fiber One banana-cranberry spice muffins
These muffins rock, and not just your colon! They actually taste really good! They stay moist for days, they're incredibly healthy, and they're a cinch to make. They're even better than my Hippy Muffins.

So, eat up you hippies!

Banana-Cranberry Spice Muffins
Recipe Source: Fiber One website

1 cup Fiber One® original bran cereal
1 egg
3/4 cup fat-free (skim) milk
3 tablespoons vegetable oil
1 cup mashed ripe bananas (about 2 medium)
1 1/4 cups all-purpose flour
1/2 cup sugar
3 teaspoons baking powder
1 teaspoon ground cinnamon
1/4 teaspoon ground nutmeg
1/4 teaspoon salt
1/2 cup sweetened dried cranberries

Heat oven to 350°F (the original recipe stated 400°, but I found that to be too hot and would burn the muffins). Grease bottoms only of 12 regular-size muffin cups with shortening or cooking spray, or use paper baking cups. Place cereal in resealable food-storage plastic bag; seal bag and crush with rolling pin or meat mallet (or crush in food processor).

In medium bowl, beat egg, milk and oil with fork or wire whisk until well mixed; beat in bananas. Stir in cereal; let stand 5 minutes.

Stir in remaining ingredients except cranberries until blended. Stir in cranberries. Divide batter evenly among muffin cups.

Bake 20 to 25 minutes or until light golden brown. Immediately remove from pan to cooling rack.

Saturday, February 20, 2010

Before and After

Florida really got hit hard with freezes this winter. Even my "Bedsheet Boogie" attempts at saving a few precious plants did no good. After a certain amount of time, even the temperatures under the cloth/blankets thrown over the plants drop below freezing.

Sigh, this is what my garden looked like last May:


This is what it looks like now:


I know about half of this will come back, but I want to yell, "Hurry up and grow dammit! Look pretty before the weather gets too friggin hot!"

I have lots of seeds planted and plan the scout the PTA sections (Plant Torture Area) of Home Despot and Lowes for their discounted, pitiful misfits.

The garden shall rise again!

Thursday, February 18, 2010

Carrot Cake Jam!

Tigress Can Jam Challenge #2

When hubs and I were married, we had carrot cake as our wedding cake. It’s his ultimate favorite cake in the whole-wide-world, and I happen to love it too. I had taken the Wilton cake decorating classes for a whole year before our wedding because I wanted to make our wedding cake. I couldn’t fathom spending hundreds of dollars on a cake and somehow, it seemed like the perfect wedding gift for the both of us. Homemade, made with love, imperfect, and beautiful.

So when this month’s Can Jam Challenge ventured into the world of the carrot, I mentioned out loud, “Hey, I think I’ll make that Carrot Cake Jam I’ve had my eye on.” I didn’t think there would be any objections.

Carrot cake jamThis beautiful jam tastes very much like apple butter, but there’s something else. The flecks of carrot accent every bite with a subtle earthiness. My jam set up to more of a soft-spread, which I prefer to harder set jams and jellies. Definitely a keeper recipe and this jam would make a gorgeous gift for anyone.

Carrot Cake Jam
Recipe Source: Ball Complete Book of Home Preserving
Makes 7 - 8 half pints

1 1/2 cups finely grated carrots
1 1/2 cups chopped cored peeled pears
1 3/4 cups crushed, canned pineapple, including juice
3 tbsp lemon juice
1 tsp ground cinnamon
1/2 tsp ground nutmeg
1/2 tsp ground cloves
1 package powdered fruit pectin
6 1/2 cups sugar

Combine carrots, pears, pineapple and juice, lemon juice, and spices in a large saucepan and bring to boil. Lower temperature to a simmer and simmer for 20 minutes, stirring frequently.

Add powdered pecting, incorporating well, and bring carrot mixture back to a boil. Add sugar all at once and return back to a full boil, stirring constantly. Boil hard, stirring constantly, for 1 full minute.

Ladle hot jam into prepared jars, leaving 1/4 inch headspace. Process in a boiling water bath for 10 minutes.

Tuesday, February 09, 2010

Central Florida Birds of Prey Center

Last week, me and a very good friend, Mary, decided to go visit our two "adopted" children who were living at the Central Florida Birds of Prey Center. For Christmas, Mary bought me a year-long "parenthood" gift for an injured, and wonderfully sweet Barred owl named Merlin.


Merlin's story is a little sad. He was brought to the center in 1987 as a juevenile. He had spent several weeks (illegally) with humans, who took him from his nest, which resulted in Merlin becoming imprinted on human beings. Imprinting means a bird will relate to humans, not their own species, which leaves them with no hunting or other survival skills.

There is a small window of opportunity where birds imprint on their caregivers, whether it is human, animal, or another bird. From that point on, the bird will try to learn the behaviors of their caregiver for survival, and if it is a human versus another bird (in my case, an owl), well it leaves little room for the bird to learn how to live as a bird.


After arriving imprinted on humans, Merlin was place in a large aviary with other owls. Sensing that Merlin was "different" from them, the owls attacked him, leading to the loss of his left eye. So, now Merlin cannot be housed with other owls, but is now an Ambassador of the center and helps teach children and adults about owls.I have to say that he has one of the most espressive, soulful faces I've ever seen on an animal.


My friend Mary adopted a Red Shouldered Hawk named Picasso who also lost an eye. I don't remember Picasso's story, but he sure was beautiful.


We also got to see some of the center's absolutely gorgeous bald eagles. Up close, they are very LARGE and so very stoic. All in all, it was a beautiful day!

Tuesday, February 02, 2010

The Good and The Bad - Part 1

As a foodie, I’m constantly experimenting with new recipes and cooking techniques. Sometimes, recipes turn out better than I had ever expected, and sometimes the results are just plain ugly. I think it’s the challenge that attracts me. The more complicated or unusual a recipe appears the better. Now, that doesn’t necessarily mean that I will reattempt complicated recipes; I know my limits and my talents. But sometimes, even accidents are worth keeping around.

Let me present Exhibit A:

The Awesome Cornbread That Should Have Been Biscuits

Several years ago, I underwent a personal challenge to learn how to make biscuits. Not just any old biscuits, but big, flaky, tender biscuits. The kind you see on television commercials. I must have spent a year experimented with different techniques, flours, and ingredients. Finally, I found an amazing recipe that yielded THE PERFECT BISCUIT.

One morning, as I was mixing up the umpteenth batch, I accidentally added a cup more milk than was called for in the recipe. Now what was I to do? I had this soupy mess that wouldn’t amount to anything decent. So, shrugging my shoulders, I added a cup of yellow cornmeal flour to the batter, poured it into a round cake pan, and hoped for the best.

This is what resulted:

This “accident” turned out the most amazing, tender, sweet, and delicious cornbread I have ever made! It's now a staple in my recipe binder. Now I have something to spread all those jars of fruit "sauces" that were supposed to be jams or jellies. It's all good!

Accidental Cornbread

2 cups of AP flour
4 teaspoons of baking powder
1 teaspoon sugar
1/2 cup shortening, or butter (I use butter)
1 2/3 cups of milk
1 large egg
1 cup yellow cornmeal

Preheat oven to 350°

Mix flour with baking powder and sugar. Cut in shortening or butter until it resembles course meal. Mix egg with milk and stir into flour mixture. Add cornmeal and briefly stir until mixture resembles cake batter. Pour batter into a greased, 9" round cake pan and bake until golden brown on top (about 35-45 min). Cool 5 minutes on cake rack, turn cornbread out of cake pan. Enjoy while still warm!

Wednesday, January 27, 2010

Winter Manatees!

A couple of weekends ago, hubby and I went to Blue Springs State Park to see the annual cavorting of the winter manatees.

Can manatees cavort? Either way it was flipper-to-flipper action!


Each year, when the weather gets cold, these gentle giants make their way to wamer water for the winter. Manatees are warm blooded mammals that cannot survive when the water temperatures reach 60° or cooler. Fortunately, the water temperature at Blue Springs stays a toasty 72° all year long.


On this particular day, there were 155 manatees counted in this spring alone. It was a very popular place that day for local and out-of-state visitors; it was a little crowded. But the manatees did not disappoint their biggest fans.


The weather was a little blustery and overcast, but the water is always crystal clear. It almost looks like someone's swimming pool, no?

Monday, January 11, 2010

Strawberry Lemonade Concentrate

Tigress Can Jam Challenge #1

As hard as it may seem to imagine right now, summer is just around the corner. Really, it is! I promise.

And why not take advantage of all the yummy citrus that’s available now and make some of this AWESOME strawberry lemonade concentrate? Can’t you just picture it? A hot summer day with a big ol’ glass of sunshine!

Homemade strawberry lemonadeThere’s really not much to it: strawberries, fresh lemon juice, and sugar, but I cannot even put into words how delicious this tastes with sparkling mineral water! My Meyer Lemon tree still has about a dozen or two lemons on it, and I’ve already squeezed at least 4 quarts of juice out of the fruit I’ve picked so far. The freezing weather has really done a number on our citrus crops.

For drink mixture: Mix equal parts concentrate with water, sparkling mineral water, or club soda. My husband says this would be amazing with a splash of vodka!

Strawberry Lemonade Concentrate
Makes 6-8 pints
Recipe Source: Ball Complete Book of Home Preserving

6 cups fresh or frozen strawberries
4 cups fresh lemon juice
6 cups sugar

Note: If you’re using Meyer Lemons, feel free to add some bottled lemon juice to the mix to bring up the tartness. That’s what I did.

If you do not want to process this concentrate in canning jars, freeze the concentrate in 1 to 2 cup portions.

Directions:
Puree strawberries in a food processor or blender until very smooth. Mix pureed berries, lemon juice, and sugar in a large pot and bring up to about 190°. Do not bring to boil.

Prepare canning jars and lids for processing. Ladle concentrate mixture into pint jars, leaving ¼ inch headspace. Process in a boiling water bath for 15 minutes.

Monday, January 04, 2010

Happy New Year!

I know I haven’t been around here very much lately, but it’s all been good. Lately, it seems that all the things I normally obsess about have been put on the backburner.

More medication, please!

No really, things are going for the better. Last year, I promised to do a few new things with this blog, but quite honestly, I haven’t had the time or energy. I’ve wanted to transition to another blog platform, or even have the site redesigned, but again that takes time and energy. I DID; however, learn how to take better pictures, so that’s a step in the right direction. I’m hoping to make some positive changes very soon that will allow me to pick up the rest of the slack.

In regards to The Great Weight Loss of 2009….wellllllllll…the GOOD news is I entered the New Year weighing less than I did the year before. Go me! Even if it’s only 10 pounds, it’s still less than the year before. At this rate, I should hit my weight-loss goal by age 50!

Wednesday, December 02, 2009

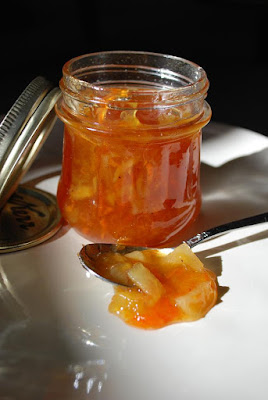
Meyer Lemon Marmalade

Remember that dreamy picture I posted of my lemon tree in bloom last March?

Well, baby got back and she's loaded with big, juicy Meyer Lemons! This past week I've made Vanilla Bean Marmalade, Lemon Ginger Marmalade, and last night, I mixed up a few quarts of preserved lemons, which should be ready before New Years!

Meyer lemon treeI'm following my basic orange marmalade recipe, which can be mixed up fruit-wise to whatever crawls up your skirt and turns you on!

Kathy's Meyer Lemon Marmalade
(makes 7-8 half pints)

5 large Meyer lemons
8 cups water
8 cups sugar

*Note: For Meyer Lemon Marmalade, I used about 5 large lemons from my tree. For "regular" store-bought Meyer lemons, use approximately 7-8 lemons. Follow the same directions for processing as listed below.

Cut each orange and lemon in half lengthwise and remove the seeds. Cut the oranges and lemons into very thin slices. You could probably use a mandoline, but I’ve never had much success with mine using citrus. Place the citrus slices and any reserved juices into a large stockpot.

Add the water and bring to a boil, stirring often. Remove from heat and add the sugar; stir until the sugar is dissolved. Place a lid on your pot and let the orange mixture sit at room temperature for 24 hours.

After 24 hours, bring orange mixture back to a boil, then lower temperature to a steady simmer. Simmer orange mixture for 2 hours, stirring often. After 2 hours, bring heat back up to medium-high and boil for 30 minutes to gel stage (220 degrees). The orange mixture should have a dark golden orange color. Ladle hot orange mixture into prepared canning jars and process in a boiling water bath for 10 minutes.

Sunday, November 29, 2009

For the Love of Schmaltz

Here’s a condensed report from this past week. Thanksgiving took a different turn this year, but it’s all good. I hope you had a wonderful holiday!

- Hubs and I went to visit my father who is in a nursing home 3 hours from where we live. He wanted a cheeseburger for Thanksgiving and I was more
than happy to bring him one.

- We actually had our Thanksgiving yesterday and it was wonderful.

- I made, I think, four…yes FOUR batches of stuffing in the past 6 days. One for a potluck at my work, one for hubs’ potluck at work, uhhhh…and I think two more batches since then; it all is just a blur.

- I almost had a huge FAIL for the stuffing I made for a Stuffed Turkey Breast Roulade recipe by accidentally adding cumin seed instead of rosemary. It turned out pretty good, but different.

- Sarah Palin came to my town last week and signed autographs for her new book… this video makes me want to move to Canada.

LOOKIT’ DEM LAZY MEXICANS, GRANDMAAA IMA OUTTA MY HOTPOCKETS!

- SJ is making Bacon Fat Infused Bourbon. I’ve always wanted to try this, so I am living vicariously through her bravery.

Sigh.

Oh, and I made the most amazing, perfect, silky-smooth, wonderfully rich turkey gravy and I owe it all to chicken schmaltz! About a month or so ago, I finally rendered some chicken fat I had slowly squirreled away in the freezer over the past year. When I thought there was enough, I melted it down, refrigerated it, and patiently waited. So, on the day-of-all-days (for us), I made a roux with about 3 tablespoon’s worth of the schmaltz and flour, added homemade chicken stock, roasted turkey drippings, and TA-DAAA, magic! I AM the Gravy Queen!

It was a beauty to behold indeed. Hubs and I are savoring every delicious drop of that gravy all week! Tomorrow, it’s back to the slow, painful death that is my day-to-day job BUT our lemon tree is finally ready for harvesting and I am making marmalade till I drop!

Have a good week!

Sunday, November 15, 2009

Green Onions

Well, I was going to start this week’s post with a voyeuristic peek into my life-long obsession with salsa, but then I made Elise’s (Simply Recipes) Apple Walnut Gorgonzola Turnovers, and was sure I had found Nirvana.

But what’s better than Nirvana you might ask? Could there be anything better than hot, applely pockets filled with melted gorgonzola, thyme, honey, and toasted walnuts?

Why, yes. Yes there is.

Last night, hubs and I went to a “Jazz in the Gardens” festival that is held every fall at a local botanical gardens. We’ve been going to this concert for about 5 years now, and it’s more of an adult, evening picnic sort-of-thing than a festival. Concert goers bring their own food and drinks (alcohol is allowed) and get to spread out on the beautiful grass with blankets and candles. It’s very romantic and lots of fun.

So, every year we look forward to choosing the right food and wine for that particular evening. Well, this year I happened to make sort of an antipasta spread with cheeses and olives and fruit. I tried a new recipe and the warning that came with said recipe claimed the following:

“WARNING: These are very addictive and you will find yourself unable to eat just one!”

And I must say, if there ever was a warning to put on a recipe, this is the most spot-on that I’ve ever seen. I TRIPLED this recipe and we couldn’t keep our hands off it!

My friends, I give you Nirvana:

Antipasta Marinated Mushrooms
Recipe Source: The Cooking Forum

1 pound of brown or white mushrooms, or a mix of both
4 tablespoons of good extra virgin olive oil, or more if needed
3 tablespoons white wine vinegar
2 cloves of garlic, minced
1/4 cup of red onions or shallots, finely chopped
2 tablespoons of fresh oregano, finely chopped
2 tablespoons fresh thyme, finely chopped
1/2 teaspoon of salt
1/2 teaspoon black peppercorns
1/4 teaspoon coriander seeds (optional)

Wash mushrooms well and remove stems. Boil mushrooms in salted water for about 10 minutes, drain and let cool. While mushrooms cool, combine all other ingredients in a jar, close the lid and shake until it's all combined. Add mushrooms, close lid and refrigerate overnight. Remove from the fridge at least 10 minutes before planning on serving it.

Note: The olive oil may get hard on the fridge, you can void that by adding some vegetable oil to the marinade , or just shaking the jar every once in a while.

Sunday, November 08, 2009

How to Use a Pressure Cooker: Lima Bean Soup

Now that the weather has cooled off.

MUUU-WWAhh-HAA-HAA-haaaaaaa….

Sorry, I couldn’t help myself. I’m in Florida, remember? It might have slipped down into the 70’s today, but that’s because there is a hurricane out in the Gulf of Mexico. This IS cool for us!

Ahem, as I was saying…now that the weather has cooled off, it’s time for some stick-to-your-ribs soups and stews. One of my most favorite kitchen gadgets to use when making heartier meals is my pressure cooker.

Back in your grandmother’s or even your mother’s time, a pressure cooker was the modern kitchen convenience gadget du jour. It was the original microwave oven. It cooked fast, used little energy, and didn’t require a lot of cooking know-how to turn out a good meal.

Unfortunately, pressure cookers have a bad rap for being unpredictable and dangerous. My husband often remarks about when his mother used to yell at him and his siblings to stay out of the kitchen when her pressure cooker was hissing away on the stovetop. She didn’t want anyone to get hurt in case the thing exploded, incapacitating a helpless bystander with molten beef stew.

Yes, pressure cookers did explode back in the day, but thanks to many years of ingenuity and manufacturing, today’s pressure cookers couldn’t be safer. Most pressure cookers have 2, 3, even up to 4 overpressure valves, o-rings, and seals that prevent even the most careless accidents from happening.

So, with that, let’s makes some soup! I use a 6 + quart Fagor Rapida pressure cooker, which is perfect for today’s dish, Lima Bean Soup. I have mentioned this soup in the past, and it’s one of my favorites.


All right, let’s have some introductions. Most pressure cookers have two pieces, a lid and a pot. My Fagor lid has an operating valve (the black knob), a pressure safety lock (the green switch), and a pressure indicator (the yellow pop-up button). So, let's get our ingredients and get cooking!


Pressure Cooker Lima Bean Soup
2-3 cups chopped, precooked ham
1 chopped onion
2-4 chopped celery stalks
3 cloves of garlic
16 oz bag of dried, large lima beans
4 cups of chicken broth
4 cups of water
2-3 tablespoons of olive oil
Seasoning of choice


First, I sauté the ham till it releases a little fat, and then throw in the onions, celery, and garlic. Saute till vegetables are soft, add the beans, water, chicken broth, seasonings and most importantly, the olive oil.


Dried beans have a tendency to foam when they are cooking and the oil helps prevent that. Foaming beans are BAD and could potentially clog one of those overpressure safety valves, which at the most would make a huge amount of noise when the thing blew. No one would get hurt, but it would scare the living daylights out of you.


Once all the ingredients are in the pot, I line up the lid and close it. My Fagor has indicator lines that guide me to seal the cooker. If a seal is not made, I would know by the amount of steam escaping from below the lid. Switch the operating valve to "close".


After sealing, I lock the lid by switching the pressure safety lock from “unlock” to “lock”. Notice how the little yellow indicator button is depressed?


Turn the stovetop burner to med-high and wait for the contents of the pressure cooker to heat up. When the cooker is sufficiently heated and pressurized, the indicator button will pop up like this.


At this point, lower the heat to low and start timing. For my Lima Bean Soup, I looked for guidance in Lorna Sass’ book titled “Pressure Perfect” and set the cooking time for 30 minutes. If you are serious about trying this pressure cooker thing, get this book! It’s basically the pressure cooking bible.

Once the soup has cooked for 30 minutes on low heat, move the pressure cooker to a cool burner and let it depressurize naturally. Don’t try to rush it, don’t switch the operating valve to “open” and do what’s often called a “quick release”. Some recipes do require a “quick release” to allow for steam to escape, which makes the cooker depressurize much faster, but that’s for another recipe and time.

When sufficiently cooled, the indicator valve will pop back down again. Unlock the lid and open it AWAY from you as there will still be a lot of steam inside the cooker. You don’t want an instant Lima Bean Soup facial!

Now, it’s soup! Taste the soup and season accordingly (salt, pepper, etc.). If, for whatever reason, the beans aren’t cooked through, bring the pressure cooker back up to pressure and cook an additional 5 minutes and depressurize naturally.


See, wasn’t that easy? If I were to cook this dish “traditionally” in a pot on the stovetop, it would have taken a good hour or two (or more) in order for the beans to cook to the desired tenderness.

Monday, October 26, 2009

How Merlot Can You Go?

Life has been busy lately and I am guessing it’s the same with you. Halloween is just around the corner and I HAVE HALLOWEEN SPRINKLES THAT HAVEN’T EVEN BEEN USED! What’s worse is that these are last year’s sprinkles! I’d better get busy.

The Squash Chronicles have been adventurous this year. I’ve managed to attack two unusual squashes that I’ve never even considered before and they were delish! Too bad the recipes I used were either meh or FAIL due to operator error. I must talk to you about risotto.

Hubs and I racked off a true wine kit Merlot yesterday that we ordered from Cellar Craft. Now, according to many die-hard wine makers, you are not a wine maker unless you make wine with grapes. I’ve only been playing wine maker with my imaginary friends for the past two years, see. Whatev!

This Merlot was amazing! I have to say, this is one of the few rare wines that I’ve made that was yummy even at a young age. We started it ohhh, in September (?) and I had my doubts about it for sure, but it’s a winnah. It’s so good that I might not even give any away!

The Canning and Preserving class is still in the works, but we are having a hard time finding kitchen space to use for classes. You’d be surprised at how many food businesses don’t own a range-top stove and use hot plates. Le sigh.

Monday, October 19, 2009

Sunrise Slowdown

Is it me or does it seem like the holidays are barreling in on us like an angry bull smacked on the behind? I just don’t know where all the time goes or how to slow things down. I’m not ready for Thanksgiving or Christmas! Stop the music!

A few weeks ago, a friend and I took some amazing photos of a field of swamp daisies at sunrise. Every morning as I went to work, I would pass 5 or 6 eager photographers poised on the side of the expressway trying to take shots like this:

The daisy bloom only happens once a year in this location, and it didn’t even do so for the past 2 years because the field was flooded. It’s right on the edge of Lake Jessup in Sanford, Florida.

Lake Jessup has the 2nd highest population of gators per shoreline mile next to Lake Okeechobee. I also find it funny that a bunch of genius businessmen wanted to start a water-ski instruction school on this lake a few years ago, but got turned down by the city. I wonder why?!! That would be like chumming for gators!

Anyway, for the past couple of years, I promised myself that I would get my butt up and get a few good shots as the flowers are only there for about a week. Then they're gone.

Here’s to slowing things down…at least for a little while.

Thursday, October 08, 2009

Rollin', Rollin', Rollin'

Friends, lovers, Amway salesmen, I have the most amazing news! I'm going to teach a Canning and Preserving class!

Let me repeat...I'm going to teach a Canning and Preserving class!

You don't know how excited I am to be able to do this! This is even more exciting than the one time where I almost had a CHIPPENDALE'S DANCER as a roomate! Back then I thought, "PLEASE GOD, LET ME JUST ONCE LIVE WITH A CHIPPENDALE'S DANCER!"

But I was fresh out of a divorce and knew the dark, horny path I was about to go down was a bad, bad move. So, I asked for my deposit back from the CHIPPENDALE'S DANCER and weeped into the sunset. The end.

Sigh.

Ahem, where was I? Oh, yes, classes will tentatively start on November 14th (a Saturday) for a 4 week, 4 class course. I plan to go next week to see if the classroom facility is legit and there will be more information to come. Be patient, darlings!

Oh, and Heather McPherson, from the Orlando Sentinel is going to write an article about me and the course! Squeeee!

More to come...

Monday, September 21, 2009

Happy Fall Y'all!

First off, Mr. Burns the black racer is getting his wardrobe ready for the impending "cold" weather here in Florida.


I found this snake skin, almost 5 ft. long, in the garden the other day. It looks like we have a naked snake slithering around here at JTRS.


No comments from the peanut gallery. Ahem.

Secondly, I have been researching and poking around about initiating, maybe even teaching (gulp), canning and preserving classes here in Central Florida! I bet you didn't know it, but there is a Canvolution going on. Yes, right at this very moment!

You see, I've been talking with the folks at local Cooperative Extension offices about offering a Master Preserving course here in Orlando. It's a no go. Not enough money, interest, politics, yadda-yadda-yadda. So, I let it sit in the back of my mind, but not forgotten. In the meantime, I've been taking the online courses at the NCHFP.

Then, a few weeks ago, a good friend of mine said, "Well, shoot Kathy, you don't need no stinkin' certification to teach people how to can." And you know something? She's right!

I believe in synchronicity, that we are all connected through the-right-time-at-the-right-place, and that our friends, lovers, aquaintences aren't coincidences. I've been reading Shauna's blog at Gluten Free Girl for years, who also happens to sponsor the Canning Across America website, which advocates local, slow food, which by the way, I BUY raw milk from the VP of Farmer Relations at our local Slow Food chapter!

Whew! All of these people have been nudging me ever so gently in their own special way over the years.

So, fall is a time to rest for many. A time to gather resources and hunker down (I hate that phrase!). But really, I hope it is a time to start anew and take on new adventures! I'm keeping my fingers crossed!

Friday, September 18, 2009

Rosemary Port Fig Jam


Doesn't this sound intriguing? I spied this recipe somewhere...dunno where, and tweaked it via Christine Ferber of Mes Confitures. I started it last night and it smelled very interesting, so I'm curious to see what it turns out to be. I bet this would be great with some goast cheese. Heck, ANYTHING would be good with goat cheese!

So, now what do I do with a whole-bottle-minus-one-cup of white Port wine?


Kathy's Rosemary and Port Fig Jam
- recipe adapted from Food and Wine Magazine
- Method adapted from Christine Ferber

4 pounds green or purple figs, stemmed and cut into 1/2-inch pieces
3 cups sugar
1/2 cup lemon juice
1 cup white port wine
1 4-inch sprig of rosemary

Place chopped figs, sugar, lemon juice, port, and rosemary in a nonreactive jam pot and let ingredients marinate for 30 min (till sugar is mostly dissolved and figs are juicy). Bring ingredients to a simmer over med-high heat, stirring occasionally, and then set aside off heat. Cool and cover jam pot; place in the refrigerator over night to macerate.

The next day, simmer the fig jam over moderate/high heat, stirring occasionally, until reaching gel stage. Remove rosemary and discard.

Spoon the jam into 6, 1/2-pint prepared jars, leaving 1/4 inch of space at the top. Process in a BWB for 10 minutes.

Tuesday, September 15, 2009

Deep-Dish Apple Pie

Have I mentioned how much I love Ina Garten? I have? Are you sure? Well...maybe just a little. Well then, let me get right to the point about her deep dish apple pie!

My wonderful, awesome husband gave me a food processor for my birthday last week. A 16-CUP-OMGBBQAPOCALYPSE-CUISINART!!!! This baby smokes my little, 5-cup Kitchen Aid FP into the dust. Still, there were some good memories there over the past 10 years.

Anyway, I went cah-razy and made pie crust this past weekend, cause OH, I CAN. Making pie crust in my old FB was a pain. And so, since I was making crust and all, why not make pie?

The crust was amazing; probably the best I've made. Oh, and the pie was good too!

Deep-Dish Apple Pie
Recipe Source: Ina Garten Barefoot Contessa Family Style

Pie Crust Ingredients(for 2, 10 inch crusts):

1 1/2 sticks of butter, cut into 1" cubes
1/3 cup very cold vegetable shortening
3 cups APP flour
1 tsp kosher salt
1 T of sugar
6-8 T of ice water (about 1/4 cup)

Place flour, salt, and sugar into FP and pulse a few times to mix. Add butter and shortening and pulse 8-10 times till butter/shortening is the size of peas. With the machine running, add water in a steady stream until dough begins to form a ball. Dump out on a floured board and roll into a ball. Wrap in plastic wrap and refrigerate.

Pie Ingredients:

5-6 Granny smith apples, peeled, cored, and quartered
Zest of 1 lemon
Zest of 1 orange
2 T of lemon juice
1 T of orange juice
1/2 cup sugar, plus 1 T to sprinkle on top of crust
1/4 cup APP flour
1 tsp kosher salt
3/4 tsp ground cinnamon
1/2 tsp ground nutmeg
1/8 tsp allspice
1 egg beaten with 1 T of water for egg wash

Preheat oven to 400°. Combine apple, zests, juice, sugar, flour, salt and spices in a large bowl. Divide pie crust into halves and roll out one half for the bottom pie crust. Don't stretch out dough. If it's too small, re-roll until it drapes into pie dish with a little hanging over the side.

Fill bottom pie crust with apple filling. Brush edges of pie crust so top crust will adhere. Roll out second half of pie dough for the top pie crust. Top the pie with the pie dough and trim to about 1 inch over the pie dish rim. Tuck top crust edge under bottom pie crust edge and crimp together with fingers or a fork. Brush entire top crush with egg wash and sprinkle with 1 teaspoon of sugar. Cut 5 slits into top crust for venting.

Place pie on a cookie sheet and bake for 1 to 1 1/2 hours, or until crust is browned and the juices begin to bubble out. If necessary, cover pie crust edges with tin foil if they brown too quickly.

Tuesday, September 01, 2009

Sign of the Times

Do you know what today is? Do you? Why today, dear friends, is the day that Fourbucks starts selling their Pumpkin Spice Lattes!

Meh, you might think, but I will have you know this landmark means a non-stop, unrelenting fallhalloweenthanksgivingchristmas free-for-all till the end of the year! PREPARE FOR THE BESOTTED FRUITCAKE!!

I actually like Fourbucks' Pumpkin Spice Latte and they're not bad calorie wise if you get the tall (small). It's only around 260 calories with non-fat milk and whipped cream. If you ditch the whipped cream, then it's around 200 calories. Not bad for a seasonal treat and they fill me up with all sorts of warm fuzzies and excitement for the frigid Florida winters. BAH!
 

design + development by kelly christine studio