Thursday, November 13, 2014

2014 Garden In Review

Last February I had ambitious dreams for my 2014 vegetable and fruit garden, and for the most part I was able to grow everything I set out to grow with success.

So pour yourself a cup of coffee and get comfortable. Let’s review how things went, shall we? My original seed growing list was this:

  • Tigger Melons
  • Red Malabar Spinach
  • Bush Beans
  • Mammoth Melting Sugar Snow Peas
  • Giant from Italy Parsley
  • Butterhead Lettuce
  • White Stemmed Pak Choi
  • Paris Market Carrots
  • Supersauce Tomato
  • Buttercrunch Lettuce
  • Sugarloaf Endive
  • Catalogna Chicory
  • Black from Tula Tomato
  • Brandywine Tomato (Suddeth's Strain)
  • Atkinson Tomato
  • Druzba Tomato
  • Cossack Pineapple Ground Cherry
  • Corvair Smooth Leaf Spinach
  • Win-Win Pak Choi
  • Detroit Dark Red Beet
  • Chioggia Beet

And I actually was able to grow everything I put in the ground. Now, granted I didn’t actually grow everything on this list; here’s what didn’t make the cut:

  • Sugarloaf Endive
  • Catalogna Chicory
  • Either Butterhead or Buttercrunch Lettuce…I did grow one, but just don’t remember.

Not bad, huh? So let’s review how things went:

Spring

Spring brought direct sow plantings of greens and peas. The Corvair Smooth Leaf Spinach is a favorite from last year and I made a point to grow more this year. What was new this year was the Pak Choi and lettuce. We LOVED the Win-Win Choi, but the White Stemmed Pak Choi got too big and leggy for my taste. The Win-Win Choi stayed small and compact and was wonderful chopped up and added to soups and stir-fry. Next year I will grow Pak Choi again, but just not as much. The lettuces were a nice treat too; and I threw in a packet of Wild Garden Lettuce Mix from Southern Exposure Seed Exchange, which was lovely. I did find; however, that we really enjoyed the baby Romaine lettuce that sprouted from this mix, so I think I will grow some Romaine lettuce next year. We also had lettuce coming out of our ears, so next year, not so much or give more away. BTW, lettuce is a pain in the butt to really clean for eating!


The Mammoth Melting Sugar Snap Peas were delicious; however, they didn’t really start producing and putting out until June-July (maybe because it was a mild year for weather?), so my plan to have Pak Choi and Sugar Snap Peas for stir-fry didn’t exactly work as the Pak Choi was done by the time the peas were ready.  I probably would grow them again if nothing else for eating right off the vine!

Late Spring/Early Summer

I planted a very unsuccessful bed of beets in May, which I have not had much luck with overall. I think the problem is they are planted in the back beds which do not get as much sun. I think beets need mild neglect to be successful in my garden. I did manage to get a few for a meal, though. Not sure if I will try again next year.

I ordered horseradish and rhubarb starts over winter and they arrived ready for planting. Of course, I won’t see anything from either for a year or two, but we’ll see.

Paris Market Carrots seeds were planted as well as Winter Sowed seedlings of Giant from Italy Parsley, and a variety of Big Box Store herb seedlings/plants to include basil, rosemary, thyme, sage, oregano, and lavender. I direct sowed the Red Malabar Spinach and Bush Beans, and I also planted Winter Sowed seedlings of Tigger Melons and Cossack Pineapple Ground Cherries.

Oh! And I was finally able to pick and eat about 2 pints of raspberries from my potted Bristow Black Raspberry bush. The crows were having their way with the ripening fruit, but not before I threw some bird netting over everything. Next year I hope to have more, as I’m planting it in the ground.


Summer

This summer was The Summer of The Tomato for sure! I Winter Sowed a lot of tomato seeds, which was mildly successful as I sowed into Styrofoam cups that had a tendency to dry out quickly. The seedlings that made it were Brandywine (Sudduth’s Strain), Black From Tula, Supersauce, Druzba, and Atkinson.

I panicked thinking that my puny seedlings wouldn’t survive to give me fruit, so I went to the Big Box Stores and bought seedlings of Better Bush, Better Boy, Big Boy, etc.  Boy, was I in for a surprise!


I planted 24 purchased seedlings and had about 15 more that were my own grown from seed. Well, not only did my puny, Winter Sowed seedlings make it in pots, but they produced the most mind-blowing, flavorful tomatoes I have ever had! So much so, that I am ONLY going to grow tomatoes that we will actually eat (versus can) for next year. All the other tomatoes were very prolific too, which ended up giving me 250 pounds of tomatoes for the season!!! But the truth is, I didn’t think they tasted all that great (compared to Brandywine!) and didn’t make that much a difference in taste from the tomatoes I purchase from the farmer’s market. So, in order to save me valuable garden real estate (and time!), I am going to purchase my canning tomatoes next year and grow only the yummiest, coveted ones for eating.


About the time the tomatoes were coming in, so were the ground cherries. I must admit the verdict is still out on this interesting fruit. They were VERY prolific and I have no doubt that I will have hundreds of ground cherry seedling volunteers next year. I did learn to let them ripen a bit after picking to get that true, mango/pineapple flavor. The cherries freeze wonderfully and that reminds me it’s time to try them out as jam!


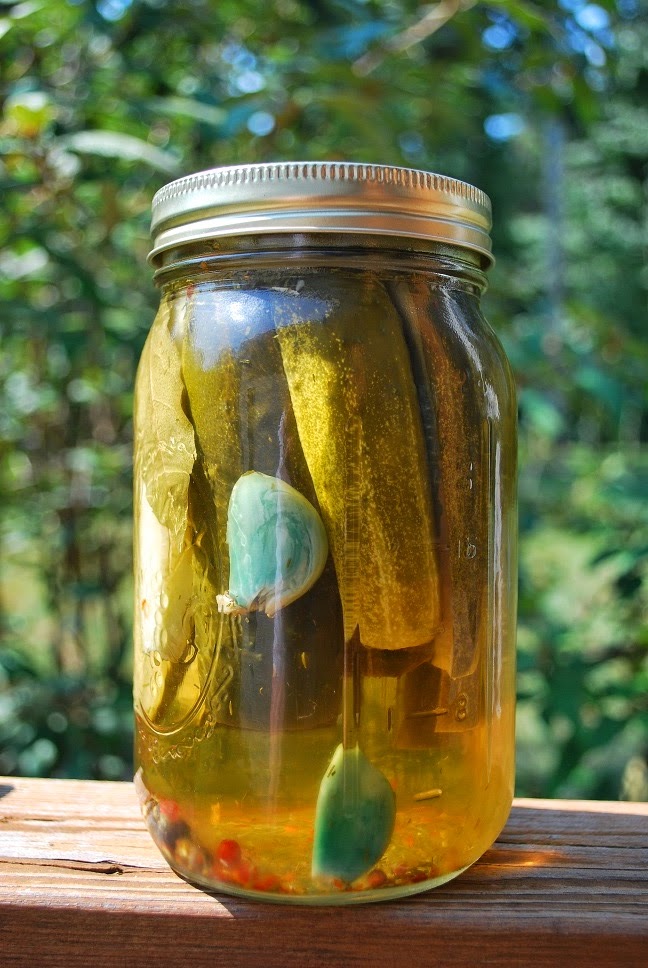
Lastly, I was able to harvest the garlic I planted from the previous October in July! They did really well, but again, I think they would do better planted in the front beds that get more sun. I’m set on garlic for quite a while! BTW, you will get blue garlic if you make pickles using fresh garlic!


Late Summer/Early Fall

This time of year is game time in the garden! Everything is coming in like gangbusters and it’s all I can do to keep up. The tomatoes kept me canning almost every week.

The Malabar Spinach was still creeping along, but was showing promise. Truth is this green wasn’t really ready for picking until late September, which didn’t mesh up with the growth chart given on the seed packet at all. I planted it in June and expected spinach in late July early August. I was so busy with everything else that I didn’t even bother to harvest. It did; however, eventually cover my trellis and what I tasted raw was yummy, so I dunno….I might try again next year.


The Paris Market Carrots were cute as could be! I had dreams of canning these cutie patooties as pickled carrots, but failed to realize that each one of these tiny things would need peeling. Sadly, not many were eaten and were left to grow into mutants.


The Bush Beans were another favorite from last year. I planted 2 ½ beds and ended up having so many beans that many were not picked. I did find that I preferred pressure canning these lovelies to blanching and freezing, so they will make the cut again next year. Who doesn’t love green beans?

Lastly, I only managed to grow 4 measly Tigger Melon plants successfully. They really do need a trellis to grow on and I just never got around to it. I eventually got 4-5 Tigger Melons, which were beautifully exotic and somehow never got eaten either. #toomuchfood


Fall/Winter

I planted a bed of garlic from some of my dried, harvested bulbs and they have sprouted! They’re in a front, sunny bed, so I’m hoping on big bulbs next summer!

The Giant from Italy Parsley has grown like a dream and I still have 8 HUGE, gorgeous plants out there, even after the frost.  From what I’ve read, parsley is a biennial, so it will come back (or stay) for another year and then set seed and die. All my other perennial herbs are doing well too.


Other miscellaneous garden-doings included finally planting the rooted runners from my single Bristow Black Raspberry bush. Man, that thing is aggressive. Earlier in the year, I bought 2 potted, fruiting figs (Olympian and Negronne) and they have grown about 3 feet from only being 6 inches high! They are now tucked away for dormancy in the garage.

Looking Ahead

I don’t typically have a fall/winter garden, as I’m usually spent from earlier in the year. But of course, my past 2 years have been focused on establishing a homestead of sorts, so who knows what will happen next year?

I will definitely give another hand at Winter Sowing and I’ve already started a “dream” list of veggies, fruits, and flowers for next year.  That’s part of the winter fun!

All the beds are tucked away, blanketed in compost, shredded leaves, and rabbit poop…dreaming. 


Thursday, October 30, 2014

Cold Storage

I have a few home improvement projects on the back burner that I want to tackle in the near future, one being an upgrade to our master bath: It's big and it's boring.


For a temporary fix, I would like to upgrade that vanity, install two large, recessed medicine cabinets, and replace the overhead light fixture with 3 sconces.

I also want to replace the "boob" light fixture in the center of the room with a nice decorative light fixture over the tub (a chandelier?) and have a recessed, can light installed over the shower. Possibly even installing a new shower door with a brushed bronze finish rather than chrome. I actually want to get rid of all the chrome in the room.

If I had my druthers, I would rip out that jacuzzi tub with a nice soaker and retile. I hate that tile. But, that's pretty much an entire remodel type upgrade and I don't think that's entirely necessary at this point. If that jacuzzi tub ever dies....welllllll then we'll talk.

But back to the doable. My biggest obstacle in thinking this out has been the friggin' medicine cabinets! I would like much larger, preferable beveled glass door medicine cabinets, but they are EXPENSIVE.

Tut, tut....

Apparently I'm not dreaming big enough. Robern makes this beauty...LOL!


I guess they call it "cold cream" for a reason!!!!

Monday, October 20, 2014

Pumpkin Picking

This past weekend, hubs and I decided to do some leaf peeping and winery exploring in the Shenandoah Mountains. The day started out glorious, but it turned overcast and chilly, which to me is the epitome of fall weather. It hasn't really been "fallish" at all this season, but I think it is finally here!

Along the way, we spotted a pumpkin patch on the side of the road. Having never actually picked a pumpkin from a pumpkin patch, we just HAD to stop.


I love pumpkins and gourds. They are so interesting in color and texture, not to mention pretty darn tasty! The patch itself was as cute as a button!


We decided on a small Turk's Cap and one of the large, green and white Cushaw squash. One thing that many people don't realize is that after being used for decoration, many of these squashes are very delicious!


After our haul, we caught a glimpse of sun peeking through the clouds onto the mountains. Imagine how spooky this graveyard is a night, but isn't it gorgeous during the day!


What a great fall day! Hope you are getting to enjoy fall wherever you are.


Tuesday, October 07, 2014

How to Cook Spaghetti Squash

I must admit that I've become more "squash adventurous" since moving up north. There are so many varieties to try! This year, it's been "The Year of the Spaghetti Squash" and I just can't seem to get enough.

The texture of spaghetti squash really isn't at all like spaghetti per say, but more like grated, cooked squash. Imagine if you took a butternut squash and grated it fine, then cooked it...that's more the texture. It still has a little veggie crunch to it, and I guess it looks like spaghetti, but believe me, that's as far as it gets to the famous carbohydrate.  

Anyway, it was always a mystery to me of what to do with it and fortunately I have found a technique and recipe that I have made no less than 5 or 6 times in the past couple of weeks. Super easy and super yummy! The primary cooking method I use is with my Crock Pot, which really is no more than plopping the squash in, adding water, and turning on the heat. This is so hands-off, that you can't help but love it!

First, I take my spaghetti squash and give it a good rinse/wash with plain water to remove exterior grime. I then cut off the stem so the spaghetti squash will fit in my Crock Pot.


I then plop the whole squash in my Crock Pot and add about 1-2 cups water. Put on the lid, set the heat to Low, and let it cook for about 6-7 hours.


After the squash is cooked, I remove it from the Crock Pot, cut the squash in half, remove the seeds, and then scoop out the flesh with a fork.


Now, we're ready for some business! You could, of course, eat the squash just the way it is now with a little salt and pepper, but I found a WONDERFUL recipe that calls for sauteing the cooked squash with a litttle butter, garlic, fresh parsley, and salt and pepper. Sublime! It gets better the next day and it is the perfect side dish.

I found my recipe at Steamy Kitchen. Doesn't this look divine? It is, trust me!

Photo from Steamy Kitchen

Tuesday, September 23, 2014

How to Use a Pressure Cooker: Curry in a Hurry

August and September are such pivotal months. The kids go back to school, so your schedule completely changes. Football season starts. The weather cools. Christmas decorations go up at the stores…..GAHHHHH! ....PANIC!

It just seems like a downhill, whirlwind slide into December from here.

Fortunately, this is the best time to whip out your pressure cooker to help make your schedule a little less stressful. Pressure cooking can take a slow-cooked main course that would normally take hours to cook on a Sunday afternoon, to being able to cook the same meal in under an hour during the workweek. Slow-cooked dishes like soups, stews, pot roasts, bean dishes, chili, sauces, you name it, can be all be prepared during the week with a pressure cooker. In addition, the cold, dark fall and winter evenings simply beg for a hearty slow-cooked meal.

Today, I am making Curry in a Hurry from Lorna Sass’ book Pressure Perfect. I mentioned before that if you are looking for a good pressure cooking cookbook, this is it. As mentioned in this recipe’s description, it’s almost too easy and too good to be true, so let’s warm up with some curry shall we?


NOTE: I am using boneless, skinless chicken thighs for this recipe; however, Lorna says you can substitute for 3 lbs of bone-in, skinless chicken thighs, OR 2 lbs of boneless pork shoulder, trimmed and cut into 1-inch pieces, OR 2 lbs boneless beef chuck, trimmed and cut into 1-inch pieces, OR 2 lbs of boneless lamb shoulder, trimmed and cut into 1-inch pieces.

Pressure Cooker Curry in a Hurry
Recipe Source: Modified from Pressure Perfect

2 lbs boneless, skinless chicken thighs cut into 1-inch pieces
1 cup of water OR coconut milk (for flavor) OR half water/half coconut milk
4 T of Patak’s Mild (or hot) Curry Paste (curry powder does not produce the same results)
1 medium onion, chopped
1/4 cup of cornstarch
1 cup plain yogurt (regular, low-fat, or even sour cream)
1 ½ cups frozen peas
3 T chopped, fresh cilantro
Salt

Pour the water or coconut milk into a 4-quart or larger cooker and blend in the curry paste. Set over high heat and add the onion and chicken. Lock the lid in place, set the heat to high, and bring your cooker to pressure. When at pressure, lower the heat to med/low, and time to cook for 8-10 minutes (for lamb 12 minutes). After cooking for 8-10 minutes, move the cooker to a cool burner and allow the cooker to depressurize naturally for 4 minutes, then do a manual pressure release (if using other kinds of meat, allow to depressurize completely. Do not do a manual release).

Remove the lid, tilting it away from you to allow steam to escape. Place cooker back on a burner and bring to a low simmer. If necessary, skim off any fat that rises to the surface. Blend the cornstarch and yogurt into 1 cup of the broth, and then add to the meat in the cooker (Note: avoid cooking yogurt under pressure as it tends to sink to the bottom of the cooker and scorch). Stir until thickened. Add the peas to the meat and simmer for 1 minute. Stir in the cilantro and salt to taste.

Serve with cooked, jasmine rice.


Additions/Variations:

  • Add 1/3 cup raisins after pressure release; add when adding yogurt
  • Garnish with raw or roasted cashews
  • Toast one or more of the following spices and stir into the curry with the yogurt:  1 T black mustard seeds, 1 tsp whole fennel seeds, and 1 tsp of whole cumin seeds. 
  • Vegetarian version: Scrub or peel 1 ½ lbs of potatoes and cut into 2 inch chunks. Prepare in the same manner except there is no need to allow time for natural depressurization; you may depressurize manually.

Thursday, September 18, 2014

Chocolate Raspberry Jam!

What can I say about this jam other than it will change your life? Imagine the pure, tart sweetness of fresh raspberries combined in a love fest of melted, bittersweet chocolate. Now take that image and smear it all over your naked body and let Ryan Gosling slowly lick it off. Got it? You’re welcome.

THAT’S what this jam will do for you!


This recipe is the love child creation from the fairy Godmother of canning, Christine Ferber and Mes Confitures, and another recipe that I’ve had for a long time. Christine Ferber’s canning recipes usually involve a 2-step process of letting the fruit and sugar macerate overnight, which greatly improves any true, bring-to-gel jam or jelly recipe, but I didn’t want to go that route with this recipe. 

Her Raspberries with Chocolate recipe also calls for processing the berries through a food mill to get rid of the seeds, which believe me, is an AWESOME way to go, but I also happen to like the seeds and doing so would also require way more raspberries to make up the bulk. So, what I really took from Christine’s recipe to make this orgasm-inducing jam is the chocolate.

Ah, yes. The chocolate.

My old recipe called for mere 3-ounces of chocolate, which was barely detectible; however, Christine calls for a healthy 9-ounces.  And besides, more chocolate is always better!

Now, where is Ryan Gosling?

Kathy’s Chocolate Raspberry Jam
Makes 6, half-pints

6 cups frozen raspberries, crushed or 7 pints fresh raspberries (I used frozen that we picked)
*¾ cup of semi-sweet chocolate or bittersweet chocolate chips, ground in a food processor
4 cups of sugar
1 box powdered pectin
2 tablespoons lemon juice
½ teaspoon butter

Note: Process the chocolate chips to where the chips resemble a rough ground powder.

Place raspberries, pectin, lemon juice, and butter in a heavy, non-reactive saucepan and bring to a full, rolling boil. Add sugar all at once; bring back to a full, rolling boil and boil for exactly 1 minute. Remove from heat and add ground chocolate; stir well to combine. Skim any foam if necessary.

Ladle jam into prepared jars, leaving ¼ inch headspace, and process in a boiling water bath for 10 minutes. 

Monday, September 08, 2014

Bean Pickin' Time

The tomatoes are done! I finished with about 8 pints of Green Salsa Verde made from all the green toms leftover.

My canning label software has been out of commission for the past couple of months, as it was residing on my old PC and not my laptop, and so I haven't been able to label all these quarts and pints of tomato products in my basement. It doesn't take long for everything to start to look the same, and it was a command decision to get my label software reloaded when what we thought was a pint of salsa spooned over nachos (football season!!!) turned out to be Chunky Basil Pasta Sauce.

Total buzzkill.


Now, my bush beans are coming in and for these babies, I simply wash, snap off the ends, snap into pieces, and then blanch/freeze for quart freezer bags. Every year, there is a discussion on the Harvest Forum on whether to freeze or pressure can beans and it's always a tie. Some people say the only way is to freeze, and some say that pressure canning is the best. Meh.

I'm with the former, as pressure canning beans results in taste and texture that is exactly like the canned green beans you would buy from the store. My thought is, "If I wanted canned green beans, I would buy them!" At least when I freeze green beans, I have some control over whether to cook the snot out of them or not. Which usually I do anyway, but sometimes I'll under cook them a little if they are going into a casserole or soup.

Happy Fall Ya'll!

Thursday, August 28, 2014

Last Tomato Haul

I thought this would be it for The Year of The Tomato, but alas, I have another tub exactly like this sitting in the garage waiting to be made into something. Last week, we hauled 40 lbs of beautifully ripe tomatoes from our patch. We are now over 200 lbs harvested this year!


Of all that we grew, our favorite by far has been Brandywine Sudduth Strain. This tomato is the epitome of the perfect balance between sweet, savory, and acidity. To me, this tomato is what a fresh tomato should taste like. A few plants made it from my winter sowing experiment and it was enough to convince me to only grow tomatoes for eating next year.


All other canning tomatoes will be purchased from the farmer's market next year. I'll admit, the sauce I made for canning did taste a little better using a mixture of all the different tomatoes I had, but it wasn't enough to convince me to do again next year. Of course, I say this now, but I might change my mind again next year. Other contenders for flavor were Early Girl and Druzba. Early Girl was pretty close to Brandywine, but they were small tangerine-sized tomatoes, and Druzba was candy-sweet. We also grew Black From Tula, which had an almost smoky flavor, but it was prone to cracking and splitting on the vine. Nope....Brandywine is my girl for this year. 

For now, I picked the last of the ripened and green tomatoes yesterday and the tomato patch will be put to rest (blight has set in). The other 40 lb tub of green and ripened tomatoes will be made into a green salsa verde. I think I'm set with canned tomatoes till next summer!

Tuesday, July 29, 2014

July In The Garden

This is the time of year where my canner, the dishwasher, the washing machine, and our compost pile are all doing overtime to keep up with the onslaught of produce. I guess that make me a busy woman too! But first, some pretty flowers...


Red gladiolas by the back porch. I love these things and can't get enough!


Black-eyed Susans blooming their little hearts out.


A Tigger Melon blossom. I ran out of steam by the time I planted these and only have 4 plants growing...I'll guess we'll see what happens.


The Tomato Prison...protecting life, liberty, and the pursuit of salsa.


We are up to 132-135 lbs of ripe tomatoes picked this season. Hubby and I had a bet. I bet that we would harvest 90 lbs and he bet 120 lbs....looks like we have both lost and we still have MUCH more to go. Basically, we have grown an entire human being in tomato weight!


Cutie patootie Paris Market carrots. These babies are about the size of a ping-pong ball or smaller. Originally, I was going to pickle them, but I couldn't find a recipe that I was interested in, not to mention I didn't think that each one of these tiny things would need to be peeled. They are going to be roasted with my measly beet harvest for dinner tonight!


Happy parsley is happy!


Bush beans are growing. I am going to have A LOT of beans (god willing) this season.


A lovely visitor on some basil flowers. I haven't had to buy any basil this year for pesto!


My languishing Malabar Spinach. I'm not sure why this isn't crawling up that trellis like a wild fire. I've given them a boost of organic fertilizer a few weeks ago and barely anything..oh well, you can't win them all.

Monday, July 21, 2014

Tomato Prison

This is what it has come down to in order to keep the friggin' crows out of my tomato patch:


I have cattle panel fencing, tin foil tied to pieces of string, twine strung across any opening, and electrical wire running along the bottom of the boxes.


At first when this all started, I thought we were having mice or rats, so we set out mouse traps. I was losing about 4-5 green tomatoes a day and had to do something. The tomatoes that were damaged didn't actually have gnaw or teeth marks on them, they seemed to be hollowed out completely from a small opening in the fruit. When we didn't catch any mice and the damage continued, I was suspicious. I knew it was something larger than a mouse/rat, as some of the limbs on the tomato vines were broken from something larger trying to get at the higher setting fruit.

I hung sheets of tin foil on string and that worked very well for a while. The occasional crinkling and noise put off from the tin foil rustling in the slightest breeze even spooked me out. It sounded like someone, or something, was sneaking up on you from behind. But still more loss.

So, I ordered this battery operated electrical wire from Amazon. Even though it is operated by D batteries, it still puts out a good zap and it has worked from keeping ground dwellers out. It worked for a while, but we still continued to lose tomatoes. I was setting my sights on the crows more and more until one day I caught one red-handed (winged?). I took a look at a tomato that was damaged and then noticed a definte "V" mark made by a beak.

The little shits land in the yard and walk right up to the beds and help themselves like it is some sort of grocery aisle. The electrical wire stopped them for a time, until they figured they could hop right over it in between the rows and party on, so we had to set up the cattle panels with the twine on top of everything else. The crows won't go into an area where they can't easily have a wing span to get out in case they are caught. They won't go into an area where they can't fly out and escape quickly.

This has worked (for now) and I scare the fcukers away from the property every chance I get. My tomato patch looks like some sort of ghetto, produce prison. Whatever....now if I can keep the bunnies from eating my hollyhocks!

Thursday, July 17, 2014

Ground Cherries

This past winter, I decided to winter sow some Cossack Pineapple Ground Cherry seeds that I ordered from a seed company. Descriptions for the fruit on these unusual plants include "pineapple in flavor" or "mango-like" and I was curious. They are in the same family as tomatoes and tomatillos, and from what I've read, they are an old garden fruit that were once grown abundantly, but not any more. The fruit makes an excellent jam, so of course that convinced me to give it a try.

More research revealed the seeds needed stratification (cold weather) to sprout and were notorious for taking a long time to do so. Well, during the winter, time is all you have, so I planted them without any expectations. To my surprise, they have done exceptionally well! At first, I wasn't bowled over by their flavor, but then I learned they needed to really ripen to get that pineapple flavor.


They do look like tiny tomatillos in their husks, but when you peel the husks back, they are about the size of a very small grape.


The plants grew to about 4 feet tall! And true to their name, the ground cherries are ready for "picking" when they fall off the plant to the ground. It's like nature's own Easter egg hunt.


I usually make two or three passes around the bed they are growing in and have been picking a bowl-full every 2-3 days. The plants have been super tough and nothing has bothered them, not even the crows! They have been pestered by flea beetles and white flies, but that hasn't slowed them down at all.

More research told me that the cherries freeze wonderfully in order to gather enough for jam, so that is what I have been doing. I let them sit in a bowl for a few days in their husks to fully ripen and dry the husks out before peeling and freezing. I can't wait to see what kind of jam these babies will make!


Tuesday, July 15, 2014

Sixteen Pounds

On Sunday, I harvested 16 pounds of tomatoes from my tomato patch. I picked 13 pounds last week, which were partly devoured on BLTs, with cheese and wine, and in salads before the rest were processed in pints for the most honored sauces.


This brings my season total up to almost 30 pounds, as I didn't weigh the first few I picked earlier. There's probably a good 20-25 more tomatoes ready to be picked even as I type...gotta love it! This batch is destined to be sliced and mixed with some fresh basil, mozzarella, olive oil, and balsamic vinegar. What is left over will be made into salsa. So far, my favorite has been Early Girl in taste. There are two German Johnson's in this batch that are heirlooms and I'm curious to see what they taste like.

Unfortunately, all of my winter sowed tomatoes weren't mature enough to make it into the garden beds and are being grown in pots. I didn't think they would make it, but surprisingly they are doing just fine. They have set fruit, but they won't be ready for a while. Next year, my goal is to only grow tomatoes that I grew from seed. No store bought transplants, even if that means I go without.

Thursday, July 10, 2014

Why Does My Garlic Turn Blue?

I was getting ready to write a post about the PERFECT dill pickle, when this happened...


Looks scary, huh? Sometimes this happens to me and sometimes it doesn't, so I decided to look into what was going on. From what I found:

"Garlic contains anthocyanins, water-soluble pigments that turn blue, green or purple in an acid solution. While this color transformation tends to occur more often with immature garlic, it can differ among cloves within the same head of garlic. The garlic flavor remains unchanged, and it totally edible without bodily harm."


And since I had just picked up some garlic from the farmer's market last weekend versus buying garlic that had been sitting in a basket in the grocery store for who-knows-how-long, that pretty much sums it up: Younger garlic will most likely turn blue/green when you pickle. 

So, it looks like this first batch of pickles will be destined for only me and my husband, as previous experience has told me that people who don't know this scientific tidbit tend to freak out when they see it. As much as I would love to use local, fresh garlic for my pickles when pickling cukes are in season, it ain't happening and I'll be digging into that basket at the grocery store.

Tuesday, July 01, 2014

Here It Comes!

Here are the first tomatoes of the season! It won't be long before I'm up to my armpits in produce and canning like crazy.


We've had to start bringing in the tomatoes when they are just starting to ripen as the crows have decided to use my garden as a drive through snack bar. What makes me even more mad is that they like to eat the green tomatoes and have picked all the lower hanging fruit off the vines. I've had to resort to putting up electrical wire and playing Rush Limbaugh on a boom box outside when I am not there.

That will keep them away!

Tuesday, June 17, 2014

What a Real Garden Looks Like

We have been inundated with greens this spring. I planted waaaaaay too much bok choi, lettuce, and spinach for just the two of us to enjoy. And enjoy it we did! It's all gone now, as the heat has made everything bolt or wilt into slime. That's okay because I'm ready to move onto malabar spinach and bush beans.


All the extra greens we had were given out to coworkers and friends. I'm always surprised when people expect perfect produce and I want to tell them, "This isn't Whole Foods, but it's better." Yeah, it may not be perfect and it might even have a few blemishes or holes, but I can absolutely guarantee that it was grown organically and with love. It's a real garden, with food grown in real soil, with real bugs, heck I might even find a sneaky slug or two.


I don't use any pesticides or chemicals, so things aren't grocery store perfect. This is what food looks like grown in a real garden.
 

design + development by kelly christine studio