Showing posts with label Dessert Recipes. Show all posts

Thursday, December 21, 2017

Favorite Christmas Cookies

Yesterday was Phase 2 of the great Christmas cookie bake off, where I baked cookies for neighbors, the mail person, local friends, etc.

More cookies!
I wanted to share some of my favorite, perennial Christmas cookie recipes that I've made over-and-over through the years. They're not particularly festive or colorful, but they taste out of this world!

So, if you want to bake some last-minute cookies this holiday season, give these a try! They won't disappoint!

Chewy Molasses Ginger Cookies
Recipe from: Annie from the Cooking Forum
Makes approximately 5-dozen

Note: This makes A LOT of cookie dough, enough for 5-dozen (at least, depending on size) cookies

3/4 cup shortening
3/4 cups butter, softened
1 cup granulated sugar
1 cup dark brown sugar
2 eggs
3/4 cup dark molasses
4 1/2 cups flour
1 teaspoon salt
4 teaspoons baking soda
2 teaspoons cinnamon
2 teaspoons powdered ginger
1 teaspoon ground cloves
1 cup finely chopped candied ginger
Coarse or turbinado sugar for rolling

Cream shortening, butter, and both sugars. Add the eggs and molasses and mix until well combined. Add the flour, salt, baking soda, and spices and mix until well combined (I don't bother sifting). Add the chopped candied ginger and mix till incorporated. Chill the dough for at least one hour.

After the dough has chilled, preheat the oven to 350°. Roll tablespoon-sized balls of the dough in the coarse or turbinado sugar. Place dough balls an inch apart on a greased or parchment-lined cookie sheet and bake approximately 10-14 minutes.

The cookies will puff-up and crack when baking. The cookies are done when the cracks should still look a little wet, but the outside looks dry. They'll "fall" as they cool. Don't over bake or they will be crunchy...but still good, though!

Chewy Molasses Ginger Cookies
White Chocolate Peppermint Crunch Cookies
Recipe from: Me!
Makes 3 dozen

Note: These are BEST if made with Andes Peppermint Crunch Baking Chips. Don't let the other impostors, such as Ghirardelli and Hershey's fool you...I've tried them all. So, if you see these in the store, grab-em! Grab a lot and stash them away, cause they're hard to find!

If you see these in the store, buy them ALL!

1/2 cup (1 stick) butter, softened
3/4 cup light brown sugar
1/2 white, granulated sugar
1 egg
1 egg yolk
1 tsp vanilla extract
3/4 tsp baking soda
1 tsp baking powder
1 tsp salt
2 1/4 cups flour
1 cup Andes Peppermint Crunch Baking Chips
1 cup white chocolate baking chips

Preheat oven to 350°. Cream butter and sugars together. Add the egg and egg yolk, mixing for about 1 minute, then add the vanilla extract. Mix in well.

Add baking soda, baking powder, salt, and flour (I don't sift) on low speed until combined. Add peppermint crunch and white chocolate chips and mix in until incorporated. If dough is too thick, add a little bit of milk (by tablespoon) to make it easier to handle.

Drop dough by rounded tablespoons onto parchment-lined cookie sheets and bake 10-12 minutes until sides slightly begin to brown. If making larger cookies, drop by 1/4 cup scoops and bake for approximately 18 minutes (that's how long mine take).

White Chocolate Peppermint Crunch cookies...very yummy and festive!

Superdoodles!
Recipe from: King Arthur Flour
Makes about 90 cookies

Note: If you love Snickerdoodles, then you will be hopelessly in LOVE with Superdoodles! Superdoodles are Snickerdoodles that have been elevated to angelic status through the addition of Hershey's Cinnamon Baking Chips. Again, if you see these in the store, BUY THEM ALL and stash them away - they're hard to find.
If you see these too...BUY THEM ALL
1 cup vegetable shortening
1 1/2 cups sugar
2 eggs
1 tsp vanilla extract
2 tsps baking powder
1 tsp baking soda
1/2 tsp salt
2 3/4 cups flour
2 cups Hershey's Cinnamon Baking Chips
Sugar
Ground cinnamon

Cream shortening and sugar together. Mix in eggs until well incorporated, then add vanilla extract. Add baking powder, baking soda, salt and flour (I don't sift) and mix on low speed until incorporated. Add the chips once the flour mixture is mixed in.

Preheat oven to 400°. In a shallow bowl, add about 1/4 cup sugar and about 1/2 tablespoon of cinnamon, then mix with a fork to make cinnamon sugar. If you'd like a stronger cinnamon-to-sugar ratio, then add 1 full tablespoon of cinnamon.

Drop dough by tablespoons and roll in the cinnamon sugar. Place on parchment-lined cookie sheet and slightly flatten with either your hand or the bottom of a glass. Bake cookies about 10-11 minutes, just until they start to turn golden. After removing from oven, lightly dust cookies with ground cinnamon (I don't bother). Try not to eat them all!

Post note: These make crunchy, rather than chewy Superdoodles. If you like chewy Snickerdoodles, try  substituting half or all of the shortening with butter. I haven't tried this yet, but someday I will.

Super Superdoodles...a new favorite!

Thursday, March 10, 2016

Pies for Pi Day - 3/14/16

Hey everyone, Pi Day is coming up next Monday on 3/14/16, so be sure to pull out your favorite pie recipes in celebration!

Actually, any occasion is a good occasion for pie, don't you agree? Of all the desserts that I like to make, pie is my favorite. For some reason, it's one of those things that people really associate with home cooking, family and childhood, and it's one that most people indulge. Cake, not so much, but a homemade pie will get people's attention.

Pie is also one of those things that people think is really hard to make, and it can be if you have to do everything all at once, but the truth is that it's one of the easiest desserts to make. In fact, the very first thing I learned how to bake was a pie.

Yesterday, I whipped up a mess of pies in a baking frenzy. I had a freezer full of last year's fruit that I wanted to use and pie is a perfect vessel. I made 5 pies and a dumpcake and brought them into my old workplace as a surprise. Most were new recipes, and two of them were unimpressive.

That's the great thing about loving to bake and having people to share it with...you get to try out new recipes!

I'm including links to the recipes I used. Here's the spread:


First from the bottom left was the Banoffee Pie, which had promise, but it turned into a soupy mess. It's basically a graham cracker crust pie with a layer of dulche de leche, sliced bananas, and whipped cream.

My take away from this is that it needs to be assembled JUST before serving and not allowed to sit overnight. 


Next up was my pride and joy, Strawberry Rhubarb. I had researched about what would be the best thickener for this "juicy" pie and quick cooking tapioca was the winner. Yum!


Next up was another new recipe, Chocolate Truffle Pie with Amaretto Cream. Let me tell you this pie was THE BOMB! I have to admit that I didn't expect it to be such a big hit, but in this pic the pie almost gone! 

Definitely a keeper.


Next up was another disappointment, Vanilla Bean Peach Pie with Almond Oatmeal Streusel. I used cornstarch for this pie and the filling was a little gluey and flat tasting. The peaches were previously fresh/frozen, so they didn't hold up very well after defrosting, plus the streusel topping was kinda boring. 

It was a pretty pie, though...I'm not including the recipe, it's not worth it. 


Lastly, not a pie, but another very pleasant surprise was a Strawberry Rhubarb Dump Cake. The most interesting thing about this is that it actually does not have any "real" strawberries in it at all, but instead strawberry jello! It was the easiest thing to throw together.

I swear it tastes like the real thing and it went over wonderfully!


Thursday, October 22, 2015

Crockpot Banana Nut Bread Cake

Hey ho; welcome back!

I’ve spent a little time tweaking things around here and the new template, but still have a few things to add and adjust. That will come. I also took advantage of this time to take a little break, but that doesn’t mean I haven’t been busy!

For example, check out this amazing Crockpot Banana Nut Bread Cake I made:


This bread/cake is AMAZINGLY moist and stays moist for days afterwards. It is so good, that I think I may have found a replacement recipe for my Cream Cheese Banana Nut Bread. I originally got this idea from Mom on Time Out's Slow Cooker Pumpkin Pie Cake recipe, which is amazing as well.

The only downside that I have found so far is the baking time, but really, you can just set-it-and-forget-it if you want to go off and do other things for a few hours. How awesome is that? And when you come back, the house smells like someone is baking something special just for you.

Can you imagine whipping up this batter beforehand and cooking it in a Crockpot at work for your next potluck luncheon? I can.


Kathy's Banana Nut Bread Cake
Recipe modified from: Mom on Time Out

1/2 cup butter
2 cups brown sugar
3 eggs
2-3 over ripe bananas, mashed (about 1 1/2 cups)
1 tsp vanilla extract
1 1/2 cups all purpose flour
1 1/2 tsp baking powder
1 1/2 tsp baking soda
1/2 tsp ground cinnamon
1/8 tsp ground cloves
1/8 tsp ground allspice
1/8 tsp ground ginger
1/2 tsp salt
1 cup toasted pecans, chopped

Line slow cooker/crockpot with a tin foil sling. Follow Mom on Time Out's example for how to make a tin foil sling. Spray tin foil with Pam. Cream butter with sugar until pale and fluffy; add eggs one at a time, mixing well in between. Add the mashed banana and vanilla extract and mix till incorporated. Combine the dry ingredients together first (or sift) in a bowl, then add to the banana mixture. Mix until incorporated, but don't over mix. Hand stir in nuts.

Pour batter into slowcooker/crockpot and cook 2-3 hours on high. Rotate tin foil sling halfway through baking to avoid over baking or burning on hot spots in your Crockpot. Start checking cake around 2 hours and test with a toothpick or butter knife. Cake is done when a toothpick or butter knife is inserted and comes out clean.


When finished, remove cake using the sling and place on a cooling rack. Peel tin foil away to allow to cool.


Then try not to eat it all!


Tuesday, August 25, 2015

Pecan Pie Cobbler

A few nights ago, I wanted to make a quick dessert to have after dinner. My go-to fix for easy, after dinner desserts is the good-old, reliable dump cake. So, pulling up Pinterest, I found this Pecan Pie Cobbler recipe from Paula at her blog Call Me PMC.

Pecan Cobbler from Call Me PMC

Actually, she calls it Pecan Cobbler, but it is SO much like a rich, cakey pecan pie, that I had to change it to Pecan Pie Cobbler. Either way, it was dead-on amazing! The great thing about this recipe is you pretty much have all the ingredients on hand and you don't need a boxed cake mix. At first, I was convinced this thing was going to be a bomb after pouring on all the water called for in the recipe. It was a bomb alright....DA' BOMB!

Serve this warm with a scoop of vanilla ice-cream and you're in heaven! This is a keeper recipe for sure!

Pecan (Pie) Cobbler
Recipe Source: Paula Jones, "Call Me PMC"

Ingredients:

6 tablespoons of butter (no substitutions)
1 cup pecans
1 1/2 cups self-rising flour
1 1/2 cups sugar
2/3 cup milk
1 teaspoon vanilla extract
1 1/2 cups light brown sugar
1 1/2 cups hot water

Preheat oven to 350°. Cut butter in large pieces and place in a 9" x 13" cake pan or casserole dish. Put dish in the oven and allow the butter to melt. When melted, remove pan from oven and sprinkle the pecans over the butter.

In a separate bowl, mix flour, sugar, milk, and extract together. Stir to combine, but don't over mix. Pour batter over pecans and butter without mixing. Sprinkle brown sugar over batter; do not stir, and carefully pour hot water over brown sugar; do not stir. This will look like a hot mess, but trust me!

Place pan in the oven and allow to bake 35-45 minutes, or until golden brown. The cobbler will not be firm after 35 minutes, but will firm up after it cools. The longer it bakes, the thicker the sauce becomes. I baked mine a little longer, which made it more of a pecan pie filling...YUM!

Serve warm with ice-cream or whipped cream. Die happy.


Tuesday, May 11, 2010

Apple Cider and Rosemary Ice Pops

I cannot begin to explain how much I LOVE these popsicles! They are so refreshing and tasty I have to really try hard to only eat just one per day.

Apple cider and rosemary ice pops

Remember that little comment I made about summer being just around the corner? Well it’s here and these popsicles will definitely keep you cool. These would be perfect as a dessert for a grown-up barbeque or summer dinner.

Apple Cider and Rosemary Ice Pops
Recipe Source: Bon Appetit

4 cups apple juice or cider
½ cup water
½ cup sugar
2 tablespoons chopped fresh rosemary
1 cinnamon stick, broken in half
2 whole cloves
4 teaspoons apple cider vinegar
¼ teaspoon vanilla extract

Combine apple juice, water, sugar, rosemary, and spices in a saucepan and heat medium-high, till mixture reaches a boil. Reduce temperature to a light simmer and reduce mixture to 3 ½ cups, 20 to 25 minutes. Strain into a 4-cup measuring cup and cool to room temperature. Stir in vinegar and extract. Pour into popsicle molds and freeze overnight or till set.

Tuesday, September 15, 2009

Deep-Dish Apple Pie

Have I mentioned how much I love Ina Garten? I have? Are you sure? Well...maybe just a little. Well then, let me get right to the point about her deep dish apple pie!

My wonderful, awesome husband gave me a food processor for my birthday last week. A 16-CUP-OMGBBQAPOCALYPSE-CUISINART!!!! This baby smokes my little, 5-cup Kitchen Aid FP into the dust. Still, there were some good memories there over the past 10 years.

Anyway, I went cah-razy and made pie crust this past weekend, cause OH, I CAN. Making pie crust in my old FB was a pain. And so, since I was making crust and all, why not make pie?

The crust was amazing; probably the best I've made. Oh, and the pie was good too!

Deep-Dish Apple Pie
Recipe Source: Ina Garten Barefoot Contessa Family Style

Pie Crust Ingredients(for 2, 10 inch crusts):

1 1/2 sticks of butter, cut into 1" cubes
1/3 cup very cold vegetable shortening
3 cups APP flour
1 tsp kosher salt
1 T of sugar
6-8 T of ice water (about 1/4 cup)

Place flour, salt, and sugar into FP and pulse a few times to mix. Add butter and shortening and pulse 8-10 times till butter/shortening is the size of peas. With the machine running, add water in a steady stream until dough begins to form a ball. Dump out on a floured board and roll into a ball. Wrap in plastic wrap and refrigerate.

Pie Ingredients:

5-6 Granny smith apples, peeled, cored, and quartered
Zest of 1 lemon
Zest of 1 orange
2 T of lemon juice
1 T of orange juice
1/2 cup sugar, plus 1 T to sprinkle on top of crust
1/4 cup APP flour
1 tsp kosher salt
3/4 tsp ground cinnamon
1/2 tsp ground nutmeg
1/8 tsp allspice
1 egg beaten with 1 T of water for egg wash

Preheat oven to 400°. Combine apple, zests, juice, sugar, flour, salt and spices in a large bowl. Divide pie crust into halves and roll out one half for the bottom pie crust. Don't stretch out dough. If it's too small, re-roll until it drapes into pie dish with a little hanging over the side.

Fill bottom pie crust with apple filling. Brush edges of pie crust so top crust will adhere. Roll out second half of pie dough for the top pie crust. Top the pie with the pie dough and trim to about 1 inch over the pie dish rim. Tuck top crust edge under bottom pie crust edge and crimp together with fingers or a fork. Brush entire top crush with egg wash and sprinkle with 1 teaspoon of sugar. Cut 5 slits into top crust for venting.

Place pie on a cookie sheet and bake for 1 to 1 1/2 hours, or until crust is browned and the juices begin to bubble out. If necessary, cover pie crust edges with tin foil if they brown too quickly.

Tuesday, March 17, 2009

It Ain't Easy Being Green

But it sure can be yummy sometimes! I bring you Key Lime Cupcakes with Key Lime Cream Cheese icing for you lucky Irish folk out there today. Or really, anyone who loves all things limey.


Key Lime Cupcakes
Makes 12 cupcakes
Recipe source: Bon Appetit

1 1/2 cups all purpose flour
3/4 cup self-rising flour
1/2 tsp salt
1 stick butter (8 tablespoons)
1 cup sugar
2 eggs
1 T of *lime zest
2 1/2 T of lime juice
Green food coloring (I used paste)
3/4 cup of butter milk

Mix flours and salt together, set aside. Beat butter till light a fluffy, add sugar and continue to beat until incorporated and fluffy. Add eggs one at a time, scraping down butter mixture in between each egg. Add lime zest and lime juice (batter will look curdled) and mix well. Add food coloring to reach a color you like. Alternately add flour mixture and buttermilk, starting and ending with flour mixture. Mix till incorporated.

Preheat oven at 350°. Pour batter in paper lined muffin tins 1/2 full. Bake 20 minutes, or until inserted toothpick comes out clean. Cool in muffin tin 5 minutes, then remove cupcakes to cool on a cake rack. Ice with Key Lime Cream Cheese icing.

*I used regular, store-bought limes as Key Limes aren't in season right now and are hard to come by.

Key Lime Cream Cheese Icing

1 stick butter
1 8 oz. package of cream cheese
1 T lime zest
1 1/2 cups confectioners sugar
1 tsp vanilla extract

Beat butter and cream cheese until smooth and fluffy. Add lime zest, confectioners sugar, and vanilla extract and beat until combined.

Tuesday, December 30, 2008

Hello, Nice to Meet You

I have to apologize for my little absence, but you see, the holidays were a blur and there’s very little left of 2008. Christmas turned out to be deliciously lazy, as hubs and I stayed home instead of driving the 8-10 hours to visit the fandamily. We enjoyed every slothful moment!

Speaking of delicious, I made some Peppermint Candy ice cream courtesy of David Lebovitz and Williams and Sonoma. Every year, we pick up a jar or two of the Chocolate Filled Peppermint Snaps from W&S, as they are very addictive, perfectly minty without being too much so, and have a sinful chocolate center. Earlier this year, it dawned on me that these darlings would make an AWESOME ice cream. I was right.

Peppermint Candy Ice Cream
Recipe adapted from The Perfect Scoop

1 cup whole milk
¾ cup sugar
2 cups heavy cream
Pinch of salt
6 large egg yolks
½ tsp vanilla extract
¼ tsp peppermint extract
½ cup crushed, hard peppermint candies (or more or less depending on your taste)

Warm the milk, sugar, and 1 cup of cream in a saucepan over medium heat. Pour other cup of cream into a large bowl with a mesh strainer on top. Beat the eggs in a small bowl and temper the egg mixture into the warm milk mixture. Stir warm milk and egg mixture until it thickens and coats the back of a spatula. Pour warm milk and egg custard through the mesh strainer and into the bowl of the remaining cream. Add vanilla and peppermint extract. Chill mixture thoroughly in the refrigerator. When ready to churn, add crushed peppermint candies.

Wednesday, September 10, 2008

Oh, Snap!

I love food that fools you. Not in a bad way, mind you, but when your brain expects one thing and you’re delivered something else. It makes you think about expectations and perceptions. More importantly it lets the food you want to highlight really shine through.

These cookies are just the ticket. Oh yes, they’re gingersnaps alright, but just a little more “snappy” than what you’d expect. The kick comes from a touch of cayenne pepper, which really emphasizes the ginger’s finishing “snap”. Hence the extra snappy.

I make these every year for the holidays, but I’m careful of who I give these to. Some people are really sensitive to spicy food and don’t like them, but they really do rock. Or snap!

Extra Snappy Gingersnaps

2 1/2 cups all-purpose flour
1 1/2 teaspoons baking soda
3/4 teaspoon cinnamon
1 teaspoon ground ginger, or more to taste
1/2 teaspoon ground cloves
1/2 teaspoon salt
1/2 teaspoon cayenne pepper
8 tablespoons (1 stick) cool unsalted butter, cut into pieces
1/2 cup granulated sugar, plus extra for rolling
1 cup light brown sugar, packed
1/3 cup molasses (not blackstrap)
1/4 cup egg whites (from about 2 eggs)

Combine the flour, baking soda, and spices in a mixing bowl and set aside. Cream the butter until smooth and fluffy in a mixer fitted with a paddle attachment (or using a hand mixer). Add the sugars and mix. Add the molasses and mix. Add the egg whites
in 2 batches, mixing to combine after each addition. Add the dry ingredients in three batches, mixing to combine after each addition. Heat the oven to 350 degrees F.

Spread a few tablespoons of granulated sugar on a small plate. Roll the dough into 3/4-inch balls, then roll each ball in the sugar until lightly coated. Transfer to parchment lined cookie sheets, leaving 1-inch of space between the cookies. Bake until browned, 8 to 10 minutes. Let cool on wire racks and store in an airtight
container. Yield: 60 cookies.

Thursday, August 14, 2008

If You Like Pina Coladas

You can thank me later for that juicy little ear-worm I just planted in your right ear. Wrath of Kahn people!

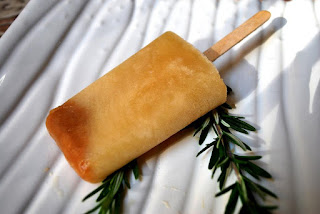
I bought these cute, little popsicle molds from Bad Breath and Beyond last month and I totally thought they would rock with those sippy straws for leakage, but they don’t. But that didn’t stop me from rocking the blender with some fresh fruit. Dole, eat your heart out!

Pina Colada Popsicles (makes 8)

½ can of pineapple chunks with ½ of the juice
½ can of coconut milk
2 very ripe bananas
½ cup to 1 cup Pina Colada drink mixer

Blend all of the ingredients in a blender till smooth. Pour into popsicle molds and freeze for 8 hours. Slurp up!

**Note: If you don’t have popsicle molds, Dixie cups will work fine with a wooden popsicle stick inserted. Wait till the mixture is halfway frozen, but soft enough to insert the stick.

Monday, March 24, 2008

Food Blogger Feast

The Easter weekend, I made a wonderful meal comprising a little bit of this-and-that from some of my favorite foodie friends. Since we skipped the whole Corned Beef-n-Cabbage thing for St. Patty’s Day, we decided that it would be wonderful for Easter. Besides, we still have about 3 lbs. of ham in the freezer leftover from Christmas and believe it or not…I’ve never made Corned Beef-n-Cabbage. I know!

We had:

New England Boiled Dinner, courtesy of Simply Recipes
Cheesy Beer Bread, from the very talented Lindsey’s Luscious
Butterscotch Ice Cream, again from Lindsey’s Luscious (she had a good thing going!)
And a simple Dump Cake, which hubby even made, from the ever reliant Cooking Forum

The corned beef dinner was the bomb, as well as everything else. The bread was a little on the salty side for my tastes, plus there’s something about wheat flour that I don’t like when baking bread. It gives everything as sort of cardboardy, flat flavor. I did use fresh dill, and that was very yummy and it made a big difference with the herb taste. I think I’ll play around with the recipe and maybe substitute the wheat flour with more AP flour or even a baking mix. I’ll cut back on the salt, but Lindey’s Luscious was right; the bread would make awesome toast!

Mean Mrs. Mustard Part Deux

On that note, the corned beef cried for mustard. So, I pulled one of my little, neglected jars of Ginger Garlic mustard out of the refrigerator. What the heck, I was feeling adventurous! What a difference time makes! A few months ago, this stuff could dissolve paint, but now it’s nice and mellow, with a good flavor. I’ll have to revisit this again and this time I’ll let the mustard seeds soak a good 24 hours before I process them in the food processor.

To be continued…

Tuesday, March 11, 2008

In Need of Inspiration

I’ve been slacking again, haven’t I? It’s not that I haven’t been busy, or haven’t made anything. I think I just haven’t been motivated to write or share anything exciting. Oh, I’ve been busy all right, and I’ve made w-o-n-d-e-r-f-u-l things, both in and out of the kitchen; I’ve just been in an inspirational slump.

So, this past weekend, I decided to make something to perk things up. Cuisine at Home had a wonderful looking tart recipe in their August 2006 issue that was just pining for some fresh Florida strawberries. And being that hubby has an incestuous attraction to tarts (no…not THOSE kind of tarts!), I decided to give it a try.

It’s a lovely custardy thing, with eggs and lemon curd, and milk, and honey. I especially liked the crust, which was more of a shortbread than a pie crust. The only thing I would change would be the jelly glaze used; I would have rather liked a citrus marmalade or jelly. I think the apple jelly didn’t do the lemon undertones justice. There’s always next time!

This is a wonderful tart to make in the dead of winter, or whenever you just need a little sunshine and inspiration!

Summer Fruit Tart with Honey-Lemon Cream and Fresh Berries
Recipe Source: Cuisine at Home, August 2006

Crust:
1 ¼ cups of all purp flour
½ cup powdered sugar
¼ tsp salt
zest of 1 lemon
1 stick of butter, cold & cubed (1/2 cup)
1 egg yolk (reserve the egg white)

Filling:
Reserved egg white from crust
½ cup lemon curd (you can buy this at any grocery…or make your own!)
3 eggs
¼ cup all purp flour
3 T of cornstarch
Pinch of salt
2 cups of whole milk
1/3 cup of honey
2 T butter
Juice of ½ lemon

Glaze:
¼ cup of jelly (apple, orange marmalade, apricot)
Juice of ½ lemon
Fresh assorted berries, about 2 cups

Crust:
Preheat oven to 400 degrees. Coat a 9” tart pan with removable bottom with a nonstick spray. Process flour, sugar, salt and lemon zest in a food processor until combined (a few pulses). Add butter and pulse till mixture resembles coarse crumbs. Dump mixture into a large bowl and blend in egg yolk with your hands (it’s easier this way). Mixture will still be very coarse/crumbly and will not clump together. Dump mixture into your tart pan and press into pan and up sides. Bake 12-15 minutes until golden brown. When you remove the crust from oven, take a spoon and press down on the crust as it will puff up a little. Place tart crust on cooling rack.

Filling:
Whisk reserved egg white and lemon curd together; add eggs. Combine flour, cornstarch, and salt together in separate bowl, then gradually add to lemon curd mixture. In a saucepan, bring milk and honey to a simmer over medium heat. Temper milk mixture with lemon curd mixture, then add all of lemon curd mixture to saucepan. Cook over medium heat until thick and bubbly, stir continuously. Be sure to allow the filling to boil/bubble for 1 full minute, as it will cook off the starchy flavor from the flour and cornstarch.

Take filling off heat and add butter and lemon juice. Mix well, then pour custard into cooled crust. Cover with plastic wrap (to prevent a skin from forming) and chill until set; about 4 hours or overnight.

Glaze:
Melt jelly and lemon juice over medium heat in a saucepan or a few seconds a microwave. Use a basting brush to brush glaze over the top of the tart. Add berries on top and brush with glaze. Enjoy!

Friday, November 16, 2007

I Don't Know Who Beatty Is...

Oh, chocolate. Oh, chocolate. You are my favorite cake flavor of all. From the moment you’re mixed into a sinful batter, to the decadent frosting, you have me dancing around the kitchen like a giddy school girl. And then, in a glimpse; I’m a woman, and have urges to do naughty things with you that involve my husband. Oh, chocolate; where have you been?

I can’t remember the last time I made a chocolate cake. There’s something about it that immediately takes me back to childhood; with smudged faces, and lots of giggling. Big, sloppy kisses. It’s no wonder that eating chocolate makes you happy; it evokes the same rush you feel when you’re in love. Sigh.

Now, I’m a pretty lucky girl. Not only does the company I work for tolerate me bringing in my baked goods on regular basis; they actually pay me to bake the monthly birthday cake. Sweet! So, this month, I had a special request to make a chocolate-chocolate cake. Where, oh where, do I start? There are a million chocolate cake recipes out there!

As it went, I started with a reliable source in Ina Garten. I like Ina. She’s elegant, simple, quality, and has an affinity for kosher salt, which is alright by me. In her latest book, “Barefoot Contessa at Home,” I found heaven in a chocolate cake recipe created by a woman named Beatty. Now, I don’t know who Beatty is, but she sure makes a mean chocolate cake! Friends, this has got to be the best chocolate cake yet. I'm talking the best I've ever had. Repeat.

I’ve. Ever. Had.

And let me tell you, in my 20 years of baking; I’ve made a lot of chocolate cakes. This cake wasn’t too rich, too sweet, or overwhelmingly chocolatey. It was simply perfect: dark, moist, had a zen balance between the icing and the cake, and was darn easy to make!

So, as I skip around the kitchen, licking the leftovers off the mixer paddle, I will leave you with this wonderful recipe. Please make it; you won’t be disappointed. Beatty, whoever you are; I thank you.

Beatty’s Chocolate Cake
Recipe source: “Barefoot Contessa at Home”

1 ¾ All purpose flour
2 cups sugar
¾ cup good cocoa powder
2 tsp baking soda
1 tsp baking powder
1 tsp kosher salt
1 cup buttermilk, shaken
½ cup vegetable oil
2 extra-large eggs, at room temperature (I used large)
1 tsp vanilla extract
1 cup freshly brewed coffee

Preheat oven to 350 degrees. Prepare two 8-inch round cake pans for baking (butter, flour, etc.). Sift the flour, sugar, cocoa, baking soda, baking powder, and salt into your mixing bowl. Mix using a paddle attachment on low speed until combined. In a separate bowl, combine buttermilk, oil, eggs, and vanilla. With the mixer on low speed, slowly add the buttermilk mixture to the dry ingredients. Next, add the coffee and mix until combined; scraping the sides and bottom of the bowl with a rubber spatula. Pour the batter into the prepared pans (it will be a very wet batter), and bake for 35 – 40 minutes, or until a toothpick comes out clean. Cool in the pans for 30 minutes, then turn them out onto a cooling rack and cool completely.

Chocolate Frosting

6 ounces of good semisweet chocolate (I used chips and they worked fine)
2 sticks of unsalted butter, at room temperature
1 extra-large egg yolk, at room temperature (I used large)
1 tsp vanilla extract
1 ¼ cups sifted confectioners’ sugar
1 T instant coffee powder

Place chocolate in a heat-proof bowl or measuring cup and melt over a double-boiler. I used the microwave for the chips and that worked fine for me. Be careful not to introduce any water into the chocolate when melting, or it will seize. After melted, set chocolate aside to cool to room temperature.

Place the butter in a mixing bowl and beat at medium-high speed with a paddle attachment until light yellow and fluffy, about 3 minutes. Add the egg yolk and vanilla and continue to beat for 3 minutes. Turn the mixer to low and gradually add the confectioners’ sugar, then beat at medium speed, scraping the mixer bowl down with a rubber spatula. In a small glass, dissolve coffee powder in 2 teaspoons of very hot tap water, then add to butter mixture. Add chocolate to butter mixture and continue to beat at medium speed until thoroughly combined. Don’t whip! Spread immediately onto cooled cake.
 

design + development by kelly christine studio