

When we had an electrical outlet installed in our pantry, the electricians had to go in through the wall on the opposite side in the garage. Fortunately, it was small enough for me to use one of my favorite drywall patch techniques: The California Patch.
I'm not sure how it got this name, but if you've ever had to patch a sizable hole in your drywall, you know that it's a nail-biting experience. There's nothing worse than to go through all the trouble to patch a drywall hole and see that it is very noticeable after priming and painting. In my experience, the California Patch technique is the easiest and gives the best results for a seamless drywall patch into an existing wall.
This drywall patch technique is best for holes no larger than 6" and my hole is right on the edge of being too big, but I was able to pull it off. The California Patch technique should be used for cosmetic patches and should not be done in areas of drywall that will later be used for load-bearing purposes (i.e. install shelving, hang pictures).
So, with that said, here's what you will need to patch up a hole using the California Patch technique:
a piece of drywall (I had leftover greenboard), some joint compound, a spackle knife, a utility knife, a measuring tape, a pencil, and something to write on.

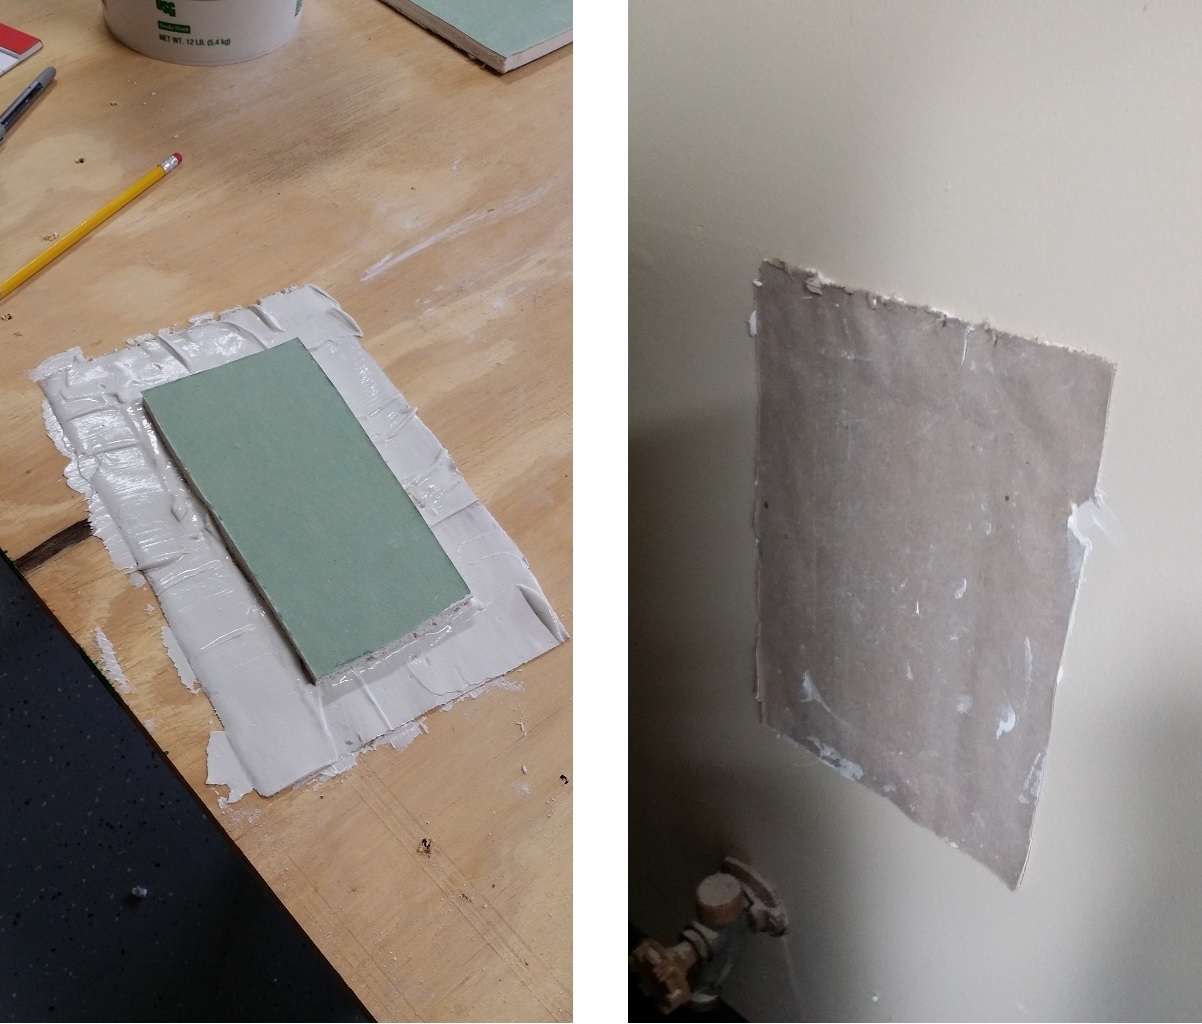
First you are going to measure your hole. In my case, I was lucky and the electrician left the original drywall piece that he cut out, so I was able to use and trace that piece for my template. Once you have your measurements, draw your hole shape on the drywall. Be sure to leave at lease 2" of drywall on all sides.

Next, you are going to score the drywall, outlining the shape of your template, without going all the way through to the bottom paper layer. Overscore to the edges and snap-and-peel the top paper and drywall material from your shape. You want to leave the bottom drywall paper layer behind. It helps to score the edges in several places and snap-and-peel in small pieces,
When you are done, you should have your drywall shape with the back paper layer exposed. I actually did this backwards and should have traced my template on the other side of the greenboard, but since this is a cosmetic patch in a non-wet environment, it should be alright.


Once you have verified the patch piece fits inside the hole, liberally butter the extending edge paper piece with joint compound and then refit the patch back into the hole. The joint compound should hold it in place.
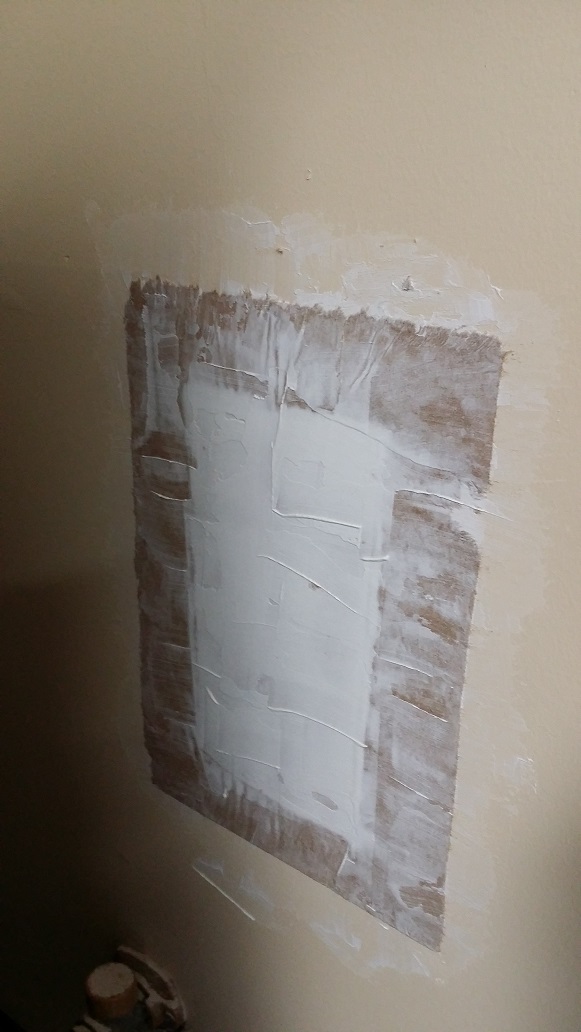
Next, take your spackle knife and start pulling out the extra joint compound from under the paper. Go all the way around and taper out from the edges. Try to make the paper smooth and flush with the surrounding drywall. Be sure to not press too hard, as you will tear the paper.

When you are done, you may have to fill in the center of the patch a little to make the patch flush with the surrounding drywall. Let it dry for 24 - 48 hours, sand some of the rougher or high points, then add another very lite skim coat of joint compound over the entire patch while feathering out into the wall. Once that is dry, sand again to make it flush with the surrounding wall, prime and paint!
I still need to sand and add my second skim coat to this, but you get the idea.
If you really want to see a true artist do this, check out Russel Olinatz's drywall repair series on Youtube. He makes it look so damn easy! #drywallrepairgoals


No comments:
Post a Comment